Building and reworking a complex mission
Curriculum mission or free mission, then sources, sourced facts, characters, concepts, dates, timeline and events: everything you can set before and after generation, tab by tab.
First mission? Start with the step-by-step guide (sign-up, class, sharing).
⚖️ Curriculum mission or free mission?
It all starts with the first choice on the “✨ Create” screen: “From my curriculum” or “Free exploration”. Both produce a mission that plays and is edited the same way; what changes is the starting point and what the AI knows about your expectations.
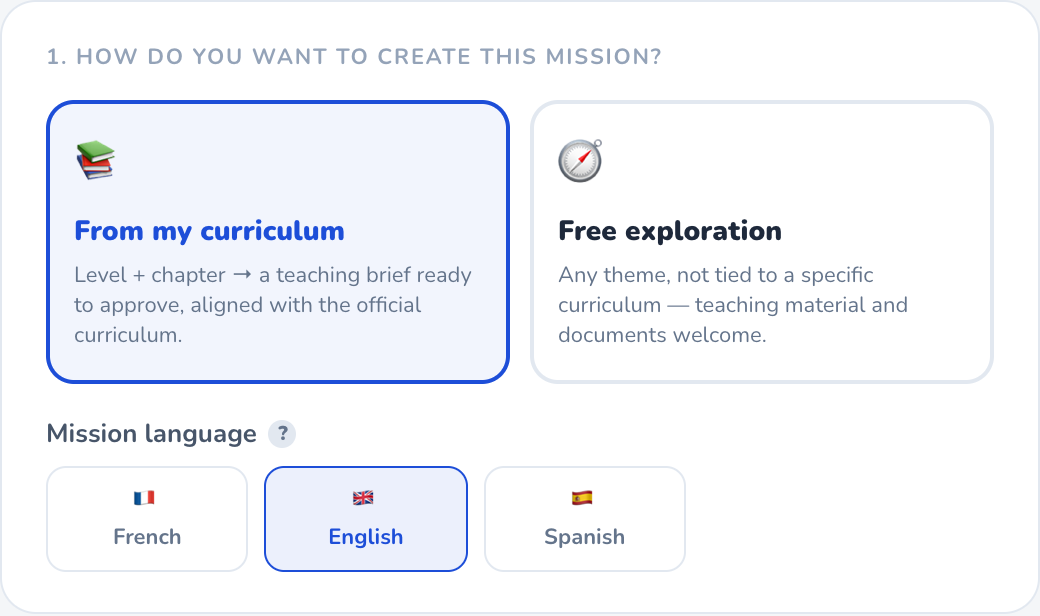
| 📚 From my curriculum | 🧭 Free exploration | |
|---|---|---|
| Starting point | Your level and a chapter of the official curriculum (England, Ontario, the US AP, France… depending on the country you pick) | An era and a theme you phrase freely |
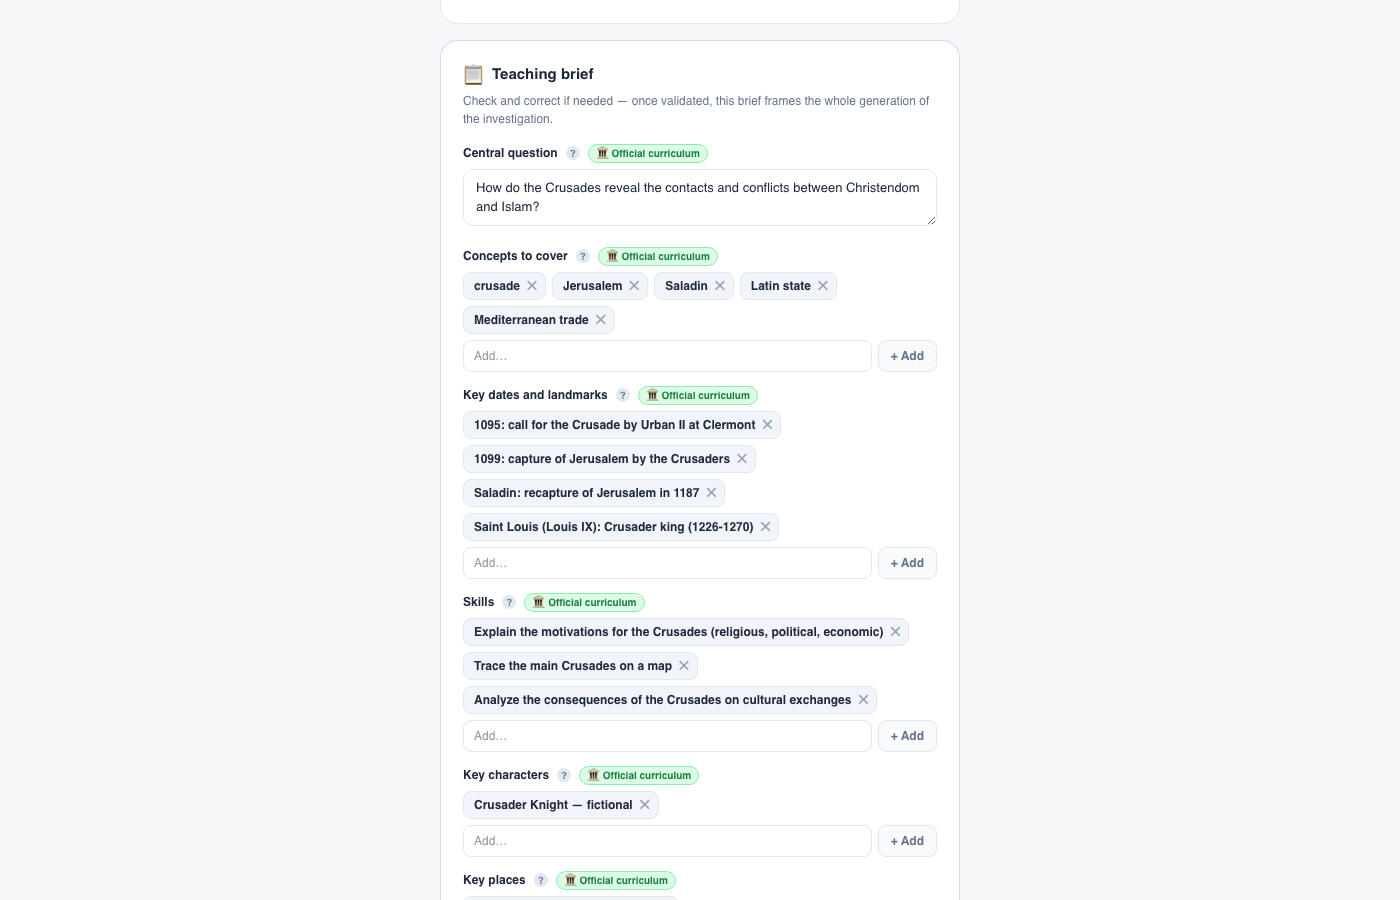
| Teaching brief | Pre-filled from the curriculum (central question, concepts, key dates, skills, characters, places, final question), each section marked “Official curriculum” — to review and approve | No brief, unless you upload teaching material: the AI then turns it into a brief to review, as for the curriculum |
| Your teaching material | Possible: “Or upload your teaching material” (PDF, Word, ODT, text) — the brief is built from its content | Also possible (single mission): “5. Documents” section — the brief is built from its content; an empty subject or period is filled in from the document |
| Sources (source corpus) | From the start, in the brief | From the start, in “5. Documents” (for a learning path, they go to every episode), or afterwards in the editor's 📚 Sources tab |
| Resource type | A mission | A mission or a learning path (several episodes) |
| Audience (juniors / adults) | Deduced from the chosen level | Chosen by hand, with difficulty and optional levels |
| Skills assessed | Suggested from the curriculum skills and the final question | Suggested from the final question |
| Domains | History-Geography, Psychology, Philosophy-Economics; Mythology through the history chapters about it; no official curriculum for Investigation | All five domains, including Investigation |
| After generation | Same editor, same tabs, same options | Same editor, same tabs, same options |
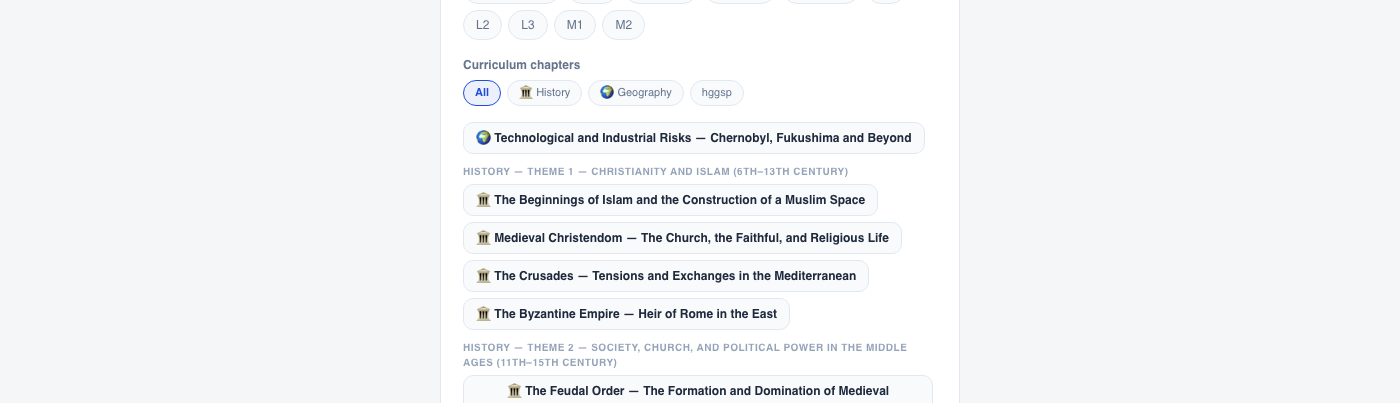
Pick the level, then a chapter: a complete brief arrives, aligned with the official curriculum. Each section shows where it comes from (“Official curriculum”, “Suggested by AI”, “Edited by you”).
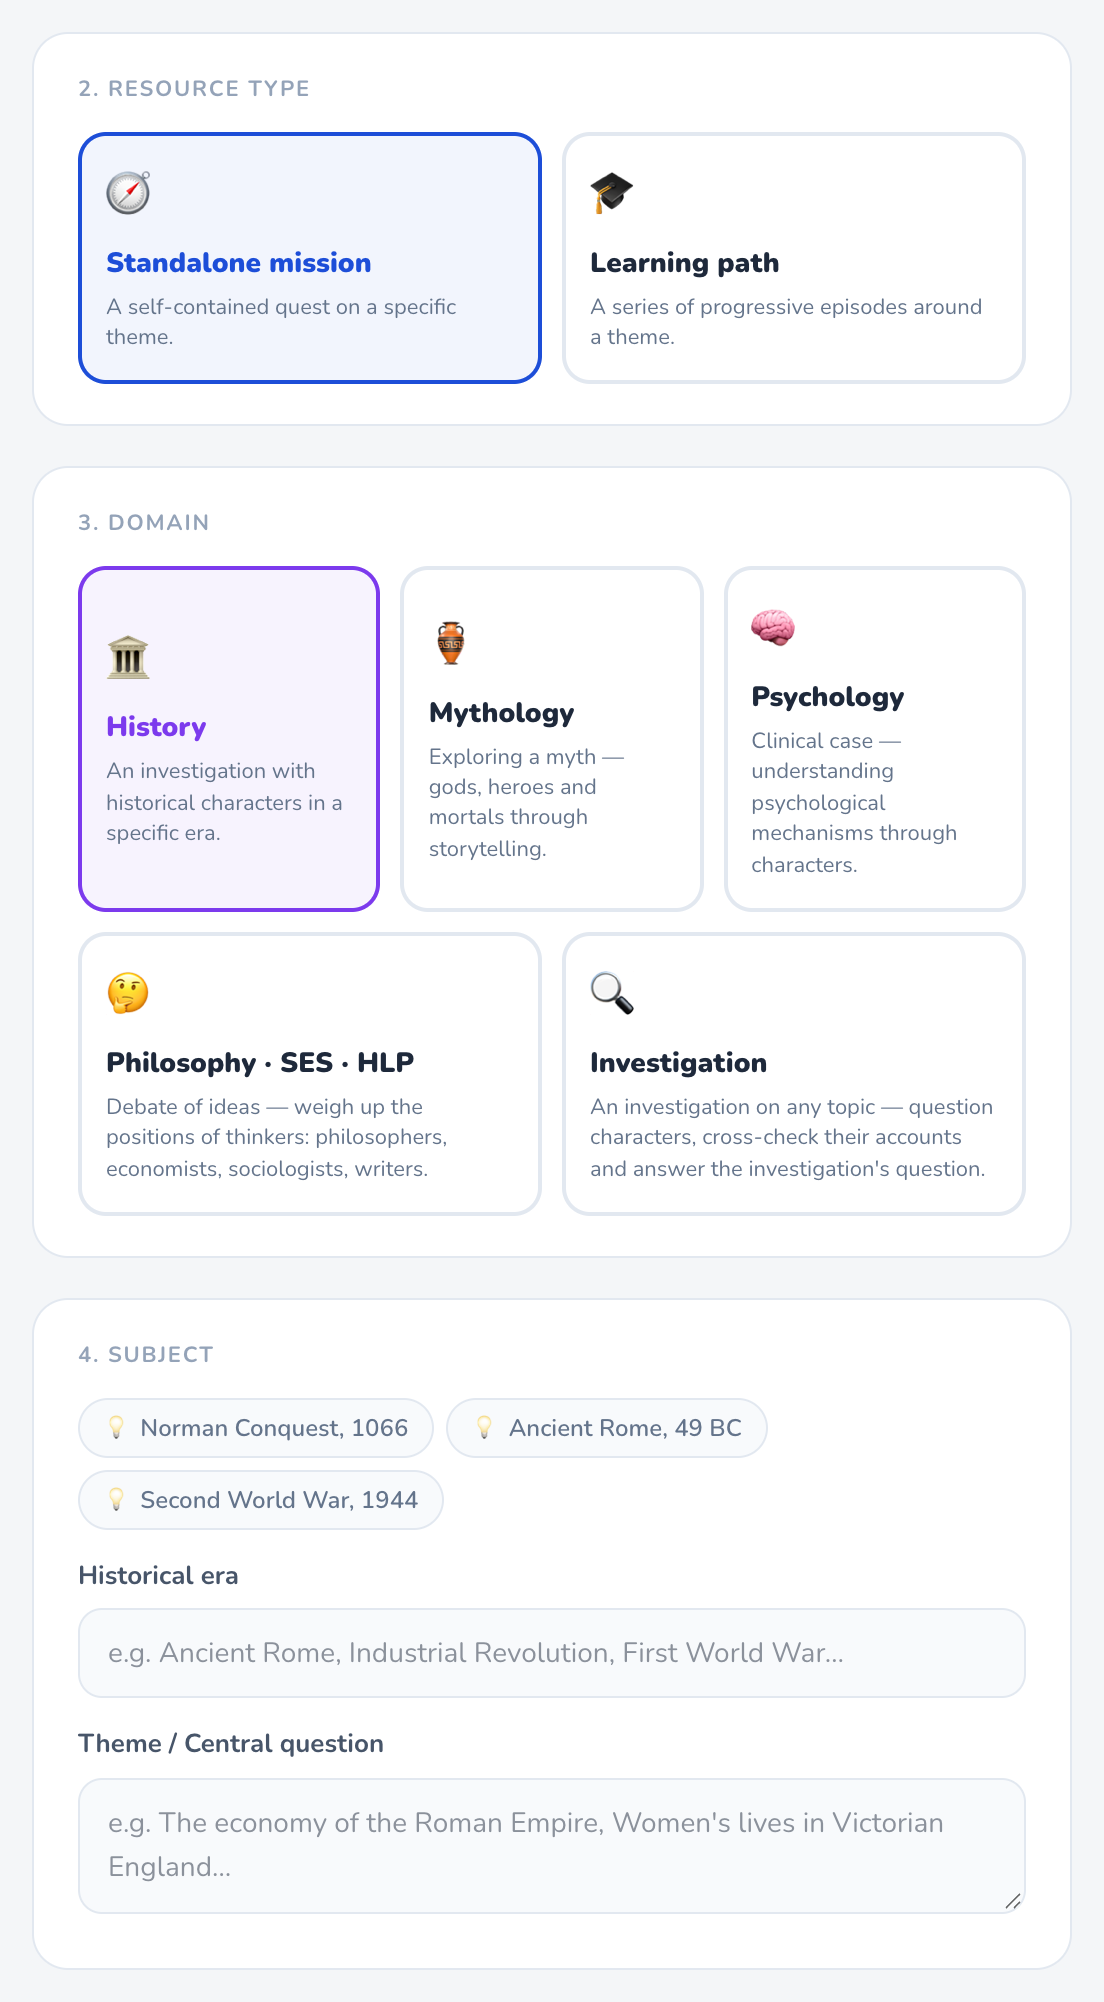
Choose the resource type (mission or learning path), the domain, then describe the era and theme. The more precise the theme (place, date, issue), the more focused the generated mission: “Paris, July 1789: from anger to the storming of the Bastille” rather than “the French Revolution”.
For a single mission, the “5. Documents (optional)” section offers the same tools as the curriculum path: “📄 Teaching material to guide the mission” (PDF, Word, ODT, text, then “📄 Analyse the document”) produces a brief you review and correct before generating, and “+ Add a source” directly adds the documents the characters can quote, together with the AI knowledge mode. During generation, each document added here is linked automatically to the characters who wrote it, lived the events it reports or could have read it in their lifetime; the 📚 Sources tab flags it “🤖 Linked automatically”, to check. For a learning path, the same section keeps only the documents, given to every episode. Nothing is required: without documents, the mission starts from the subject alone.
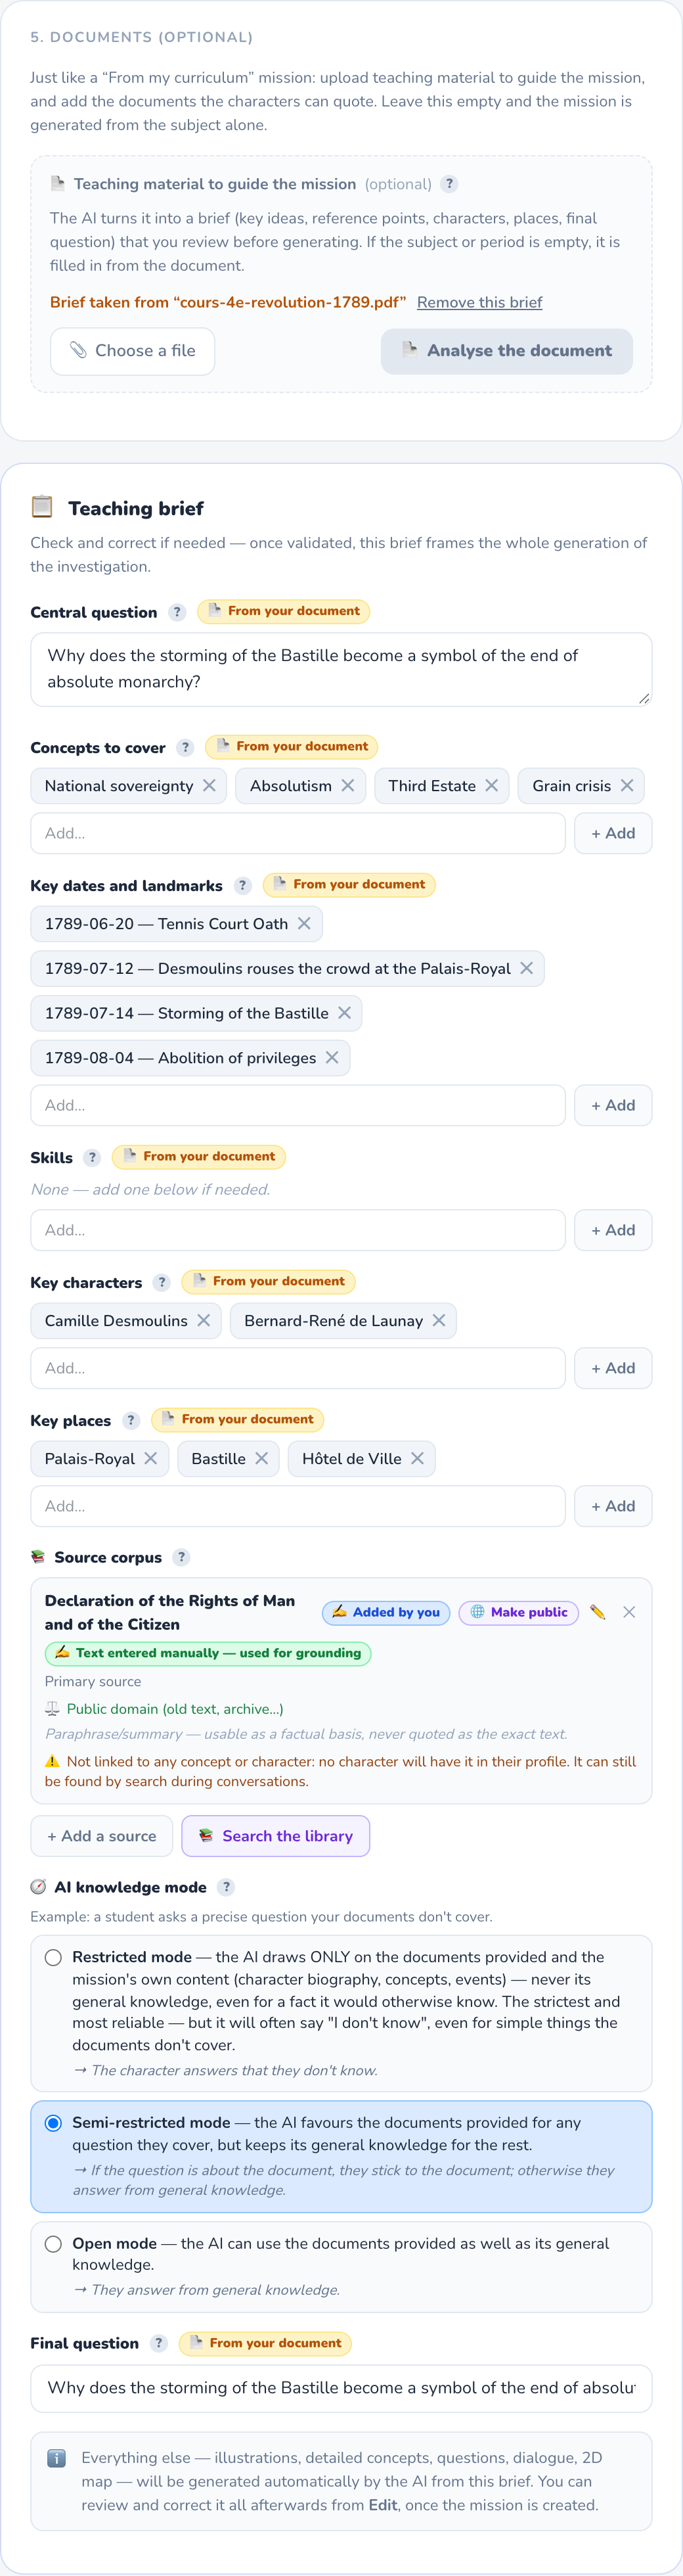
🧭 Preparing a rich brief
A complex mission is shaped first in the brief (the “From my curriculum” path, or free exploration with teaching material): whatever you specify there is used as-is by the generation and saves you long edits later. Review each section with what it will become in the game in mind:
| Brief section | What it becomes |
|---|---|
| Central question | The common thread of the investigation. |
| Concepts to cover | The concepts to discover, spread across the characters (none knows everything). |
| Key dates | The dates on the timeline. |
| Skills | What the student will have to do, and the skills assessed in the final answer. |
| Key characters | Used as-is; the AI adds others around them. Name them exactly (“Bernard-René de Launay”, not “the governor”). |
| Key places | Placed as-is on the 2D map. |
| Final question | The question the student is graded on. |
| Source corpus | The sources the characters rely on (step 4). |
🧰 Finding your way in the editor
Once the mission is generated: “📚 My missions” → “✏️ Edit” on the mission card. The editor opens with the action buttons at the top and the tabs underneath.
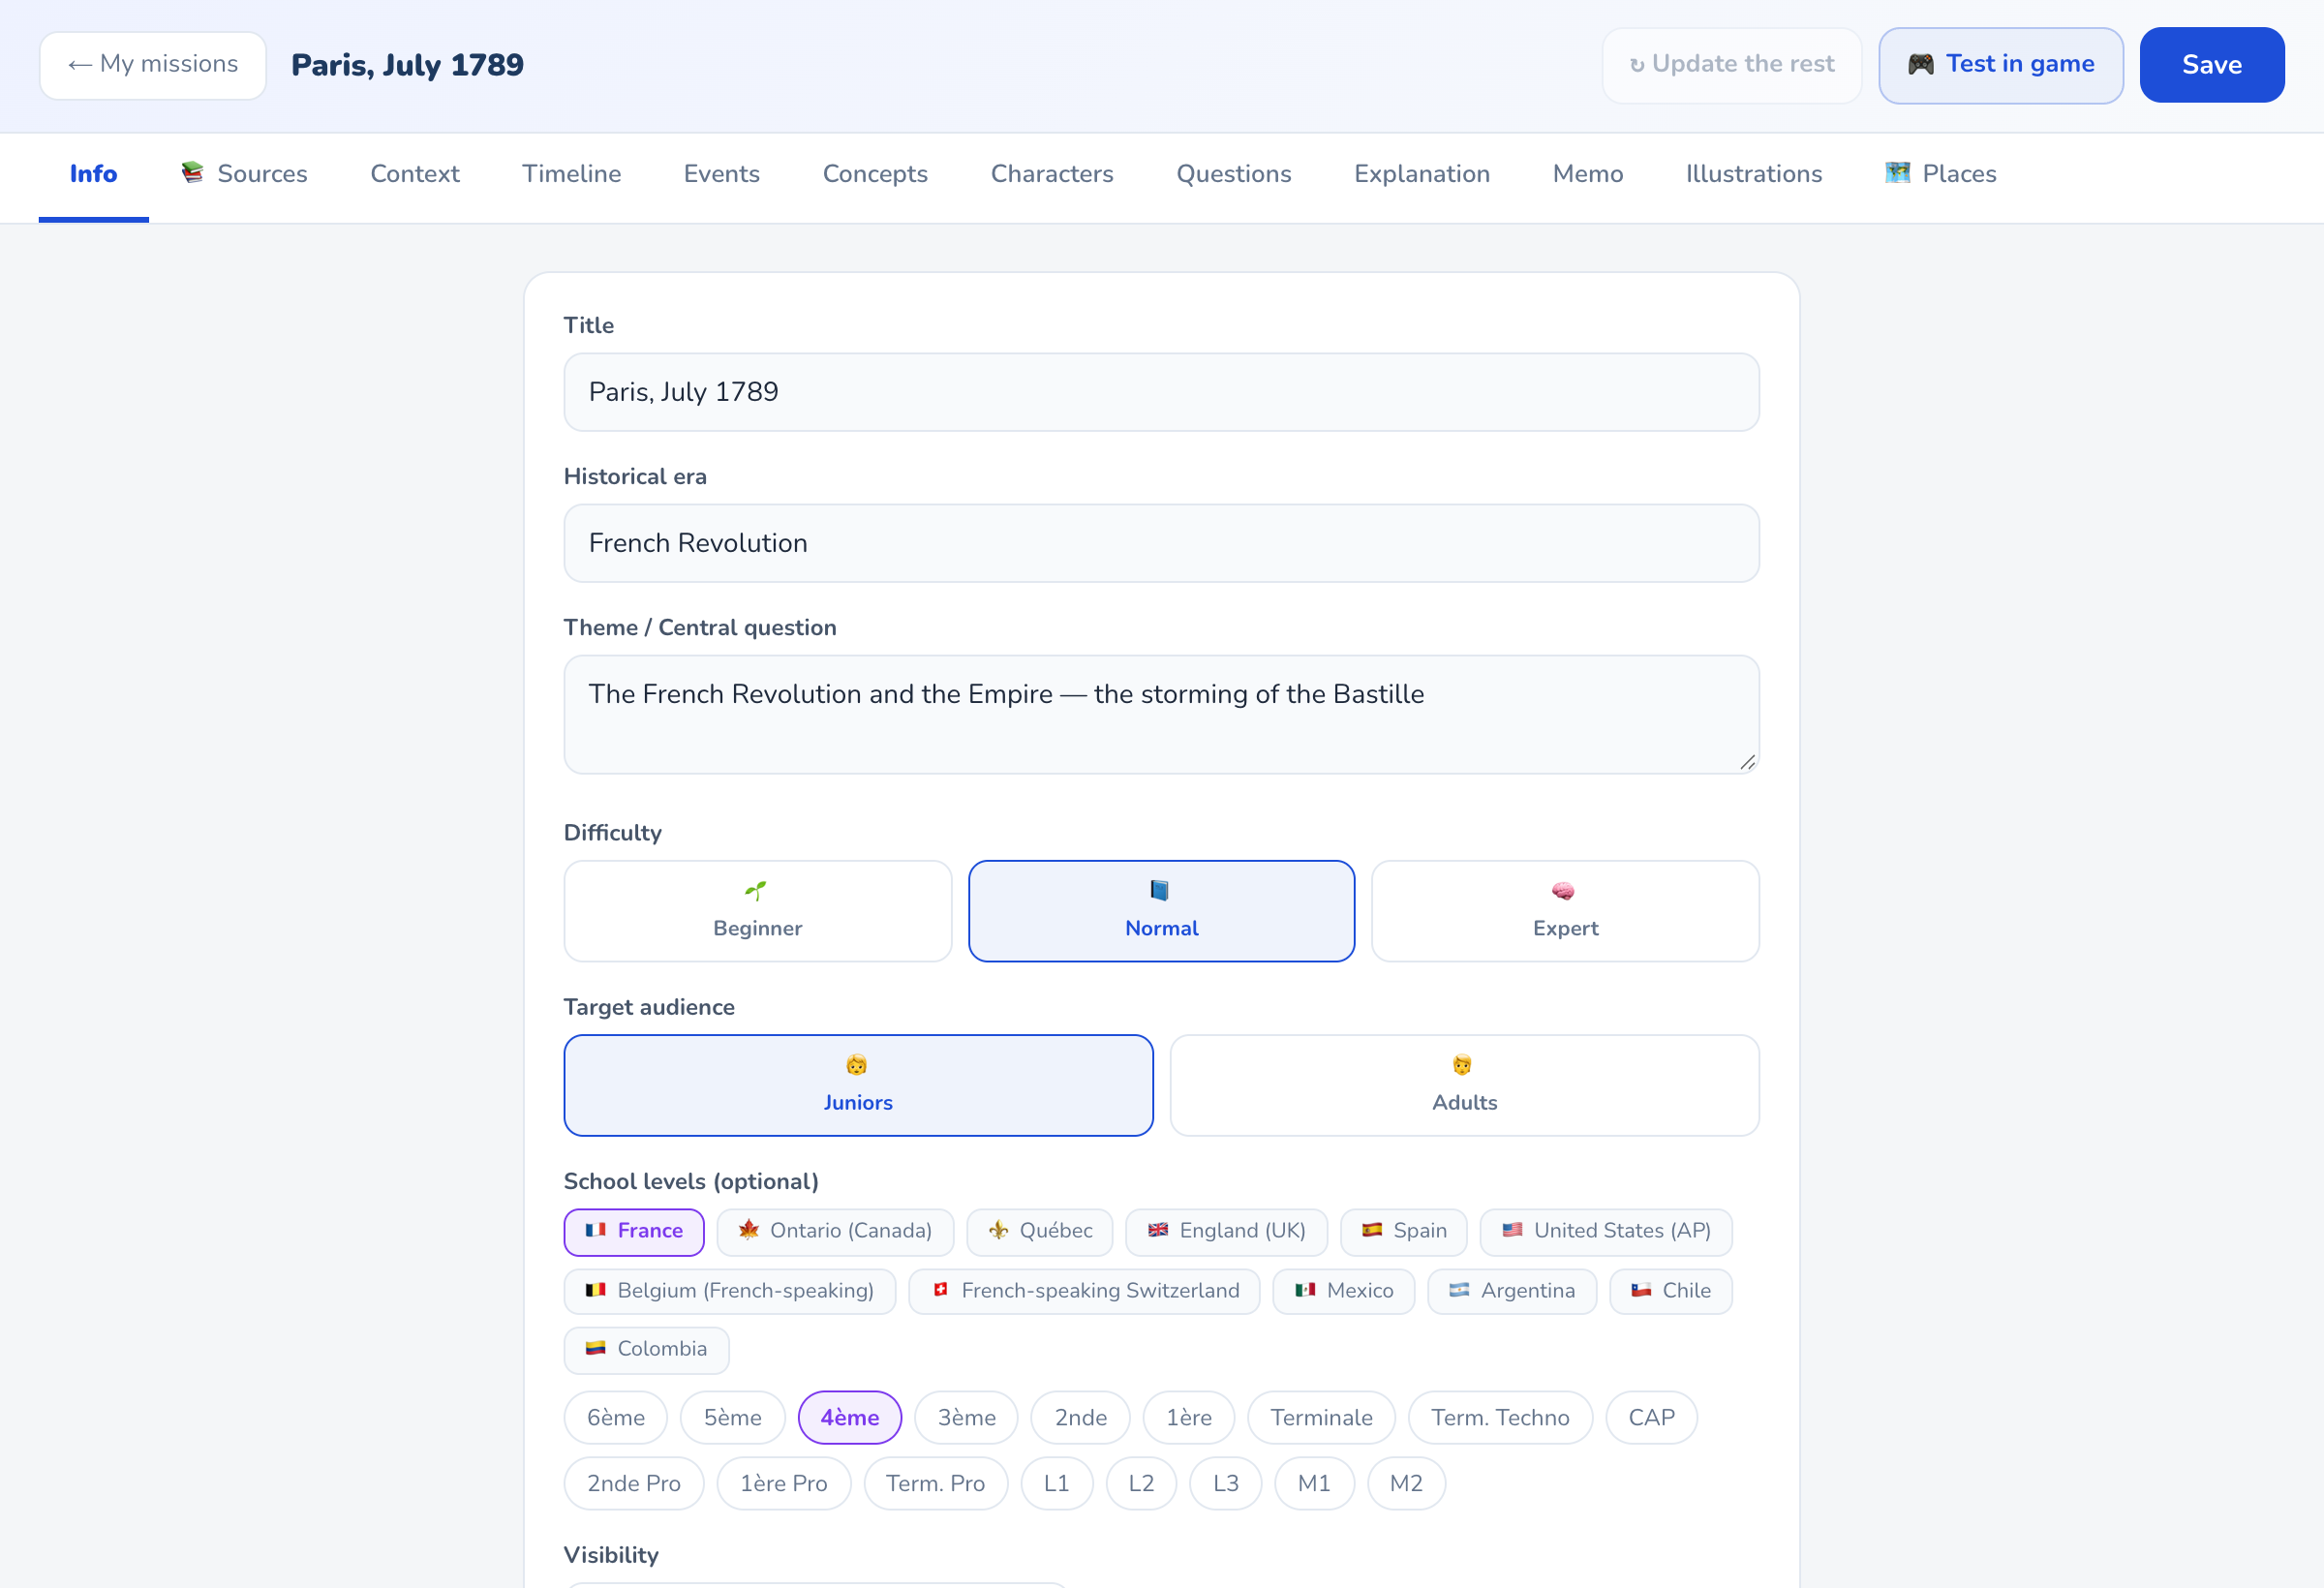
| Tab | What you set there |
|---|---|
| Info | Title, era, difficulty, audience, levels, visibility, game options (suggestions, dictation, map). |
| 📚 Sources | Source corpus and the AI knowledge mode. |
| Context | Central question, model answer, grading criteria, start date, period, location, tensions. |
| Timeline | The key dates the student sees — and can travel to. |
| Events | Plot twists, their date and their trigger conditions. |
| Concepts | What the student must discover in conversation, with hints. |
| Characters | Identity, dates, point of view, known concepts, fact sheet, documents, starter questions. |
| Questions | Intermediate questions asked during the game. |
| Explanation | The detailed solution, used as the reference to grade the final answer. |
| Memo | The printable summary sheet. |
| Illustrations | Archive images that appear during the game. |
| 🗺️ Places | The 2D map: building names, places revealed by an event, where characters stand. |
📚 Adding and setting up sources
“📚 Sources” tab → “+ Add a source”. Only the title is required; the rest makes the source more useful. The same form is available at creation: in the brief (curriculum) or in “5. Documents” (free exploration).
- Identity: title, author, date, type (primary source, secondary source, testimony, official document), bibliographic reference, URL.
- Content: paste the text, or “📎 Import a document” (PDF, .docx, .odt, .txt, .md). Imported text arrives “to validate”: read it, correct it, then “✓ Validate this content”. Until it is validated, no character uses it.
- Exact text? Tick the box only if it is the original wording: the character may then quote it in quotation marks. Unticked (the default), they rely on it without ever quoting it word for word — the right choice for a translation, like the Declaration here.
- Known from (optional): before this date, no character can use the document. Here, the Declaration of 1789-08-26 is unknown to Desmoulins on 1789-07-12.
- Related concepts and characters: decide who has the document in their sheet (see below).
- Copyright: public domain, open license, protected excerpt for my class, or “I don't know”.
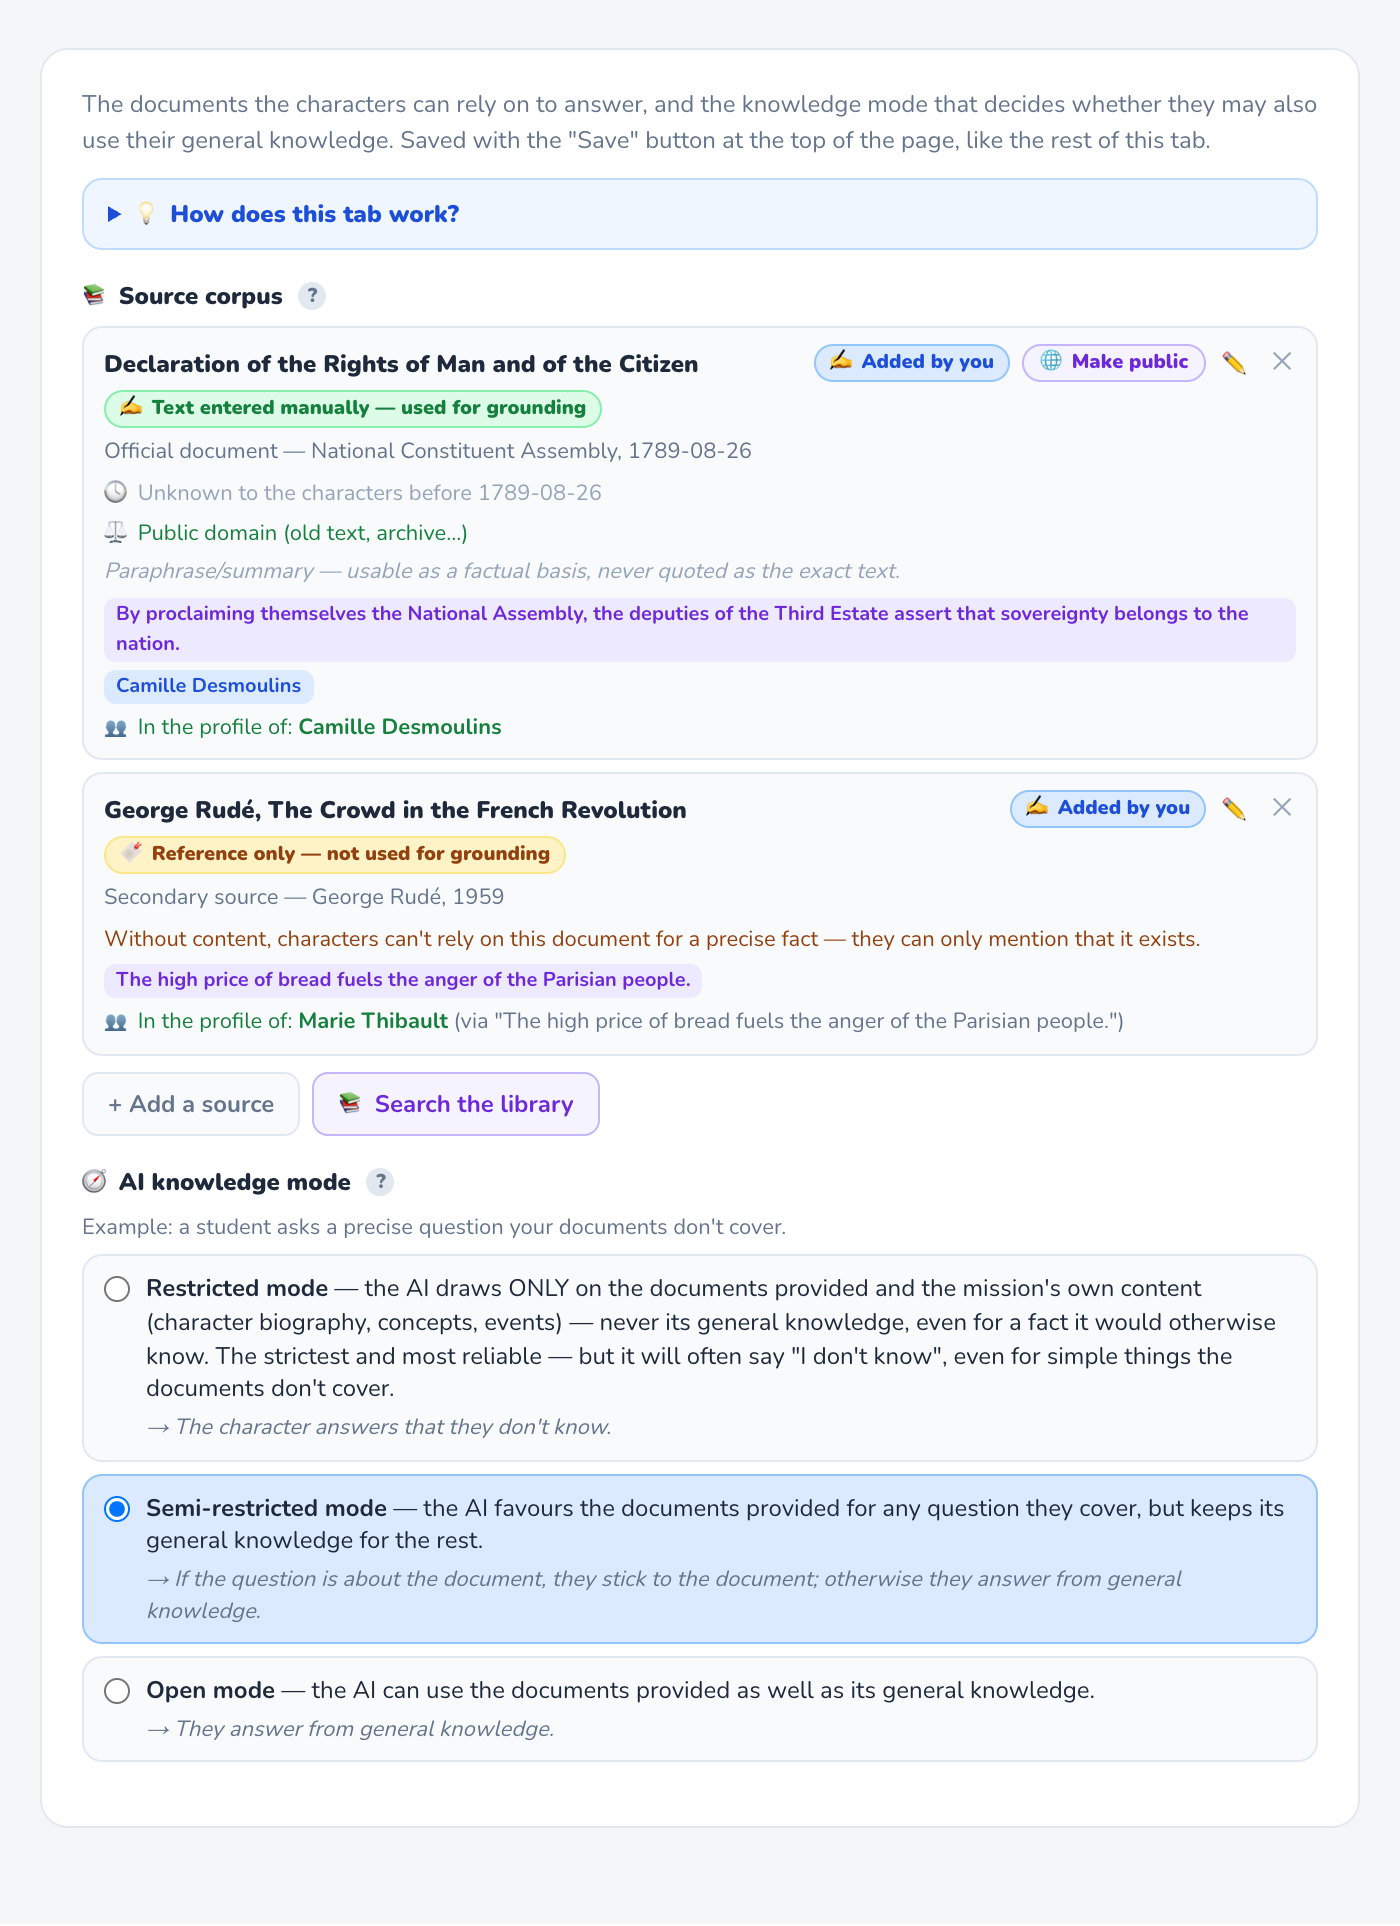
One source, three states
| State | What characters can do with it |
|---|---|
| Reference only (no text) | Say the document exists, never draw a precise fact from it. |
| Document provided — to validate | Nothing yet: the text is waiting for your review. |
| Validated, or text pasted by hand | Use it as a factual basis; the student sees the quoted passage under the answer. |
Who does the document apply to?
Characters use it in two ways. Their sheet: the beginning of the text (about 1,500 characters) is written into the sheet of the linked characters — the “👥 In the sheet of” line shows who. Search during conversation: for every question, Parlova looks for relevant passages in all validated documents, whichever character is being asked.
| You tick… | The document goes into the sheet of… | Typical use |
|---|---|---|
| A concept | Every character who knows that concept | A document that explains a theme |
| A character | That character only | Their memoirs, letters, speech |
| Nothing | Nobody (search during conversation only) | A supporting document |
The AI knowledge mode
It sets what characters may say beyond your documents, for the whole mission. It only appears once a document is validated; adding a first source sets it to semi-restricted.
👤 Adding, editing and renaming characters
“Characters” tab. Each card shows its 📚 sourced facts and 📄 documents badges at a glance: a yellow “No sources” badge flags a character to complete. “Edit” expands the sheet.
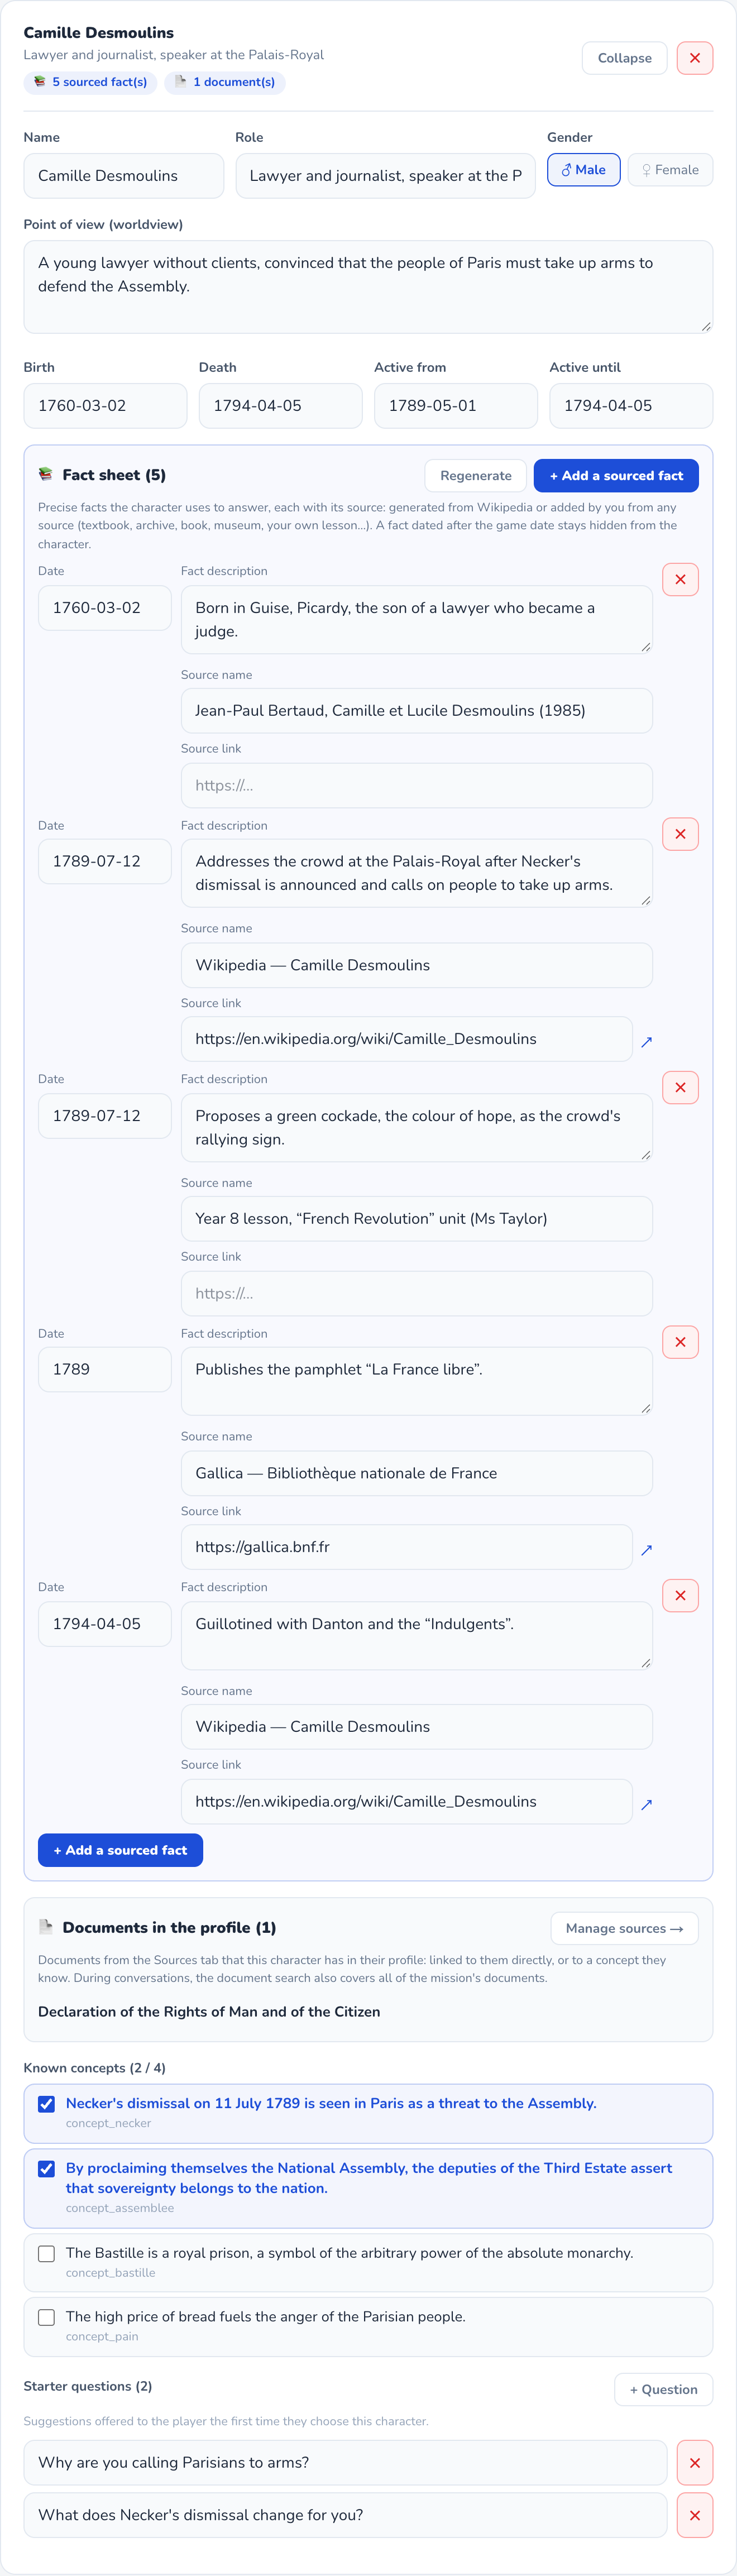
Adding a character
- “+ Add a character”, then fill in name, role and gender.
- Point of view: their worldview in two or three sentences. This is what makes them speak differently from the others — de Launay defends the king's order, the washerwoman talks about the price of bread.
- Dates: birth, death, active from, active until (see step 8).
- Known concepts: tick what they can reveal to the student.
- Starter questions: 2 or 3 suggestions offered to the student the first time they pick this character.
- Add sourced facts (step 6) and, if needed, link a document to them from the Sources tab (“Manage sources →”).
Editing, renaming, deleting
Renaming a character is safe: when you save, the new name is carried over everywhere the old one appeared — events, map and schedule, memo, linked sources, and even games your students have already started. Character sheets are rebuilt on every save, without regenerating the mission.
Deleting (✕) removes the character; then use “↻ Update the rest” (step 10) so the solution and memo no longer mention them.
🔎 Sourced fact sheets
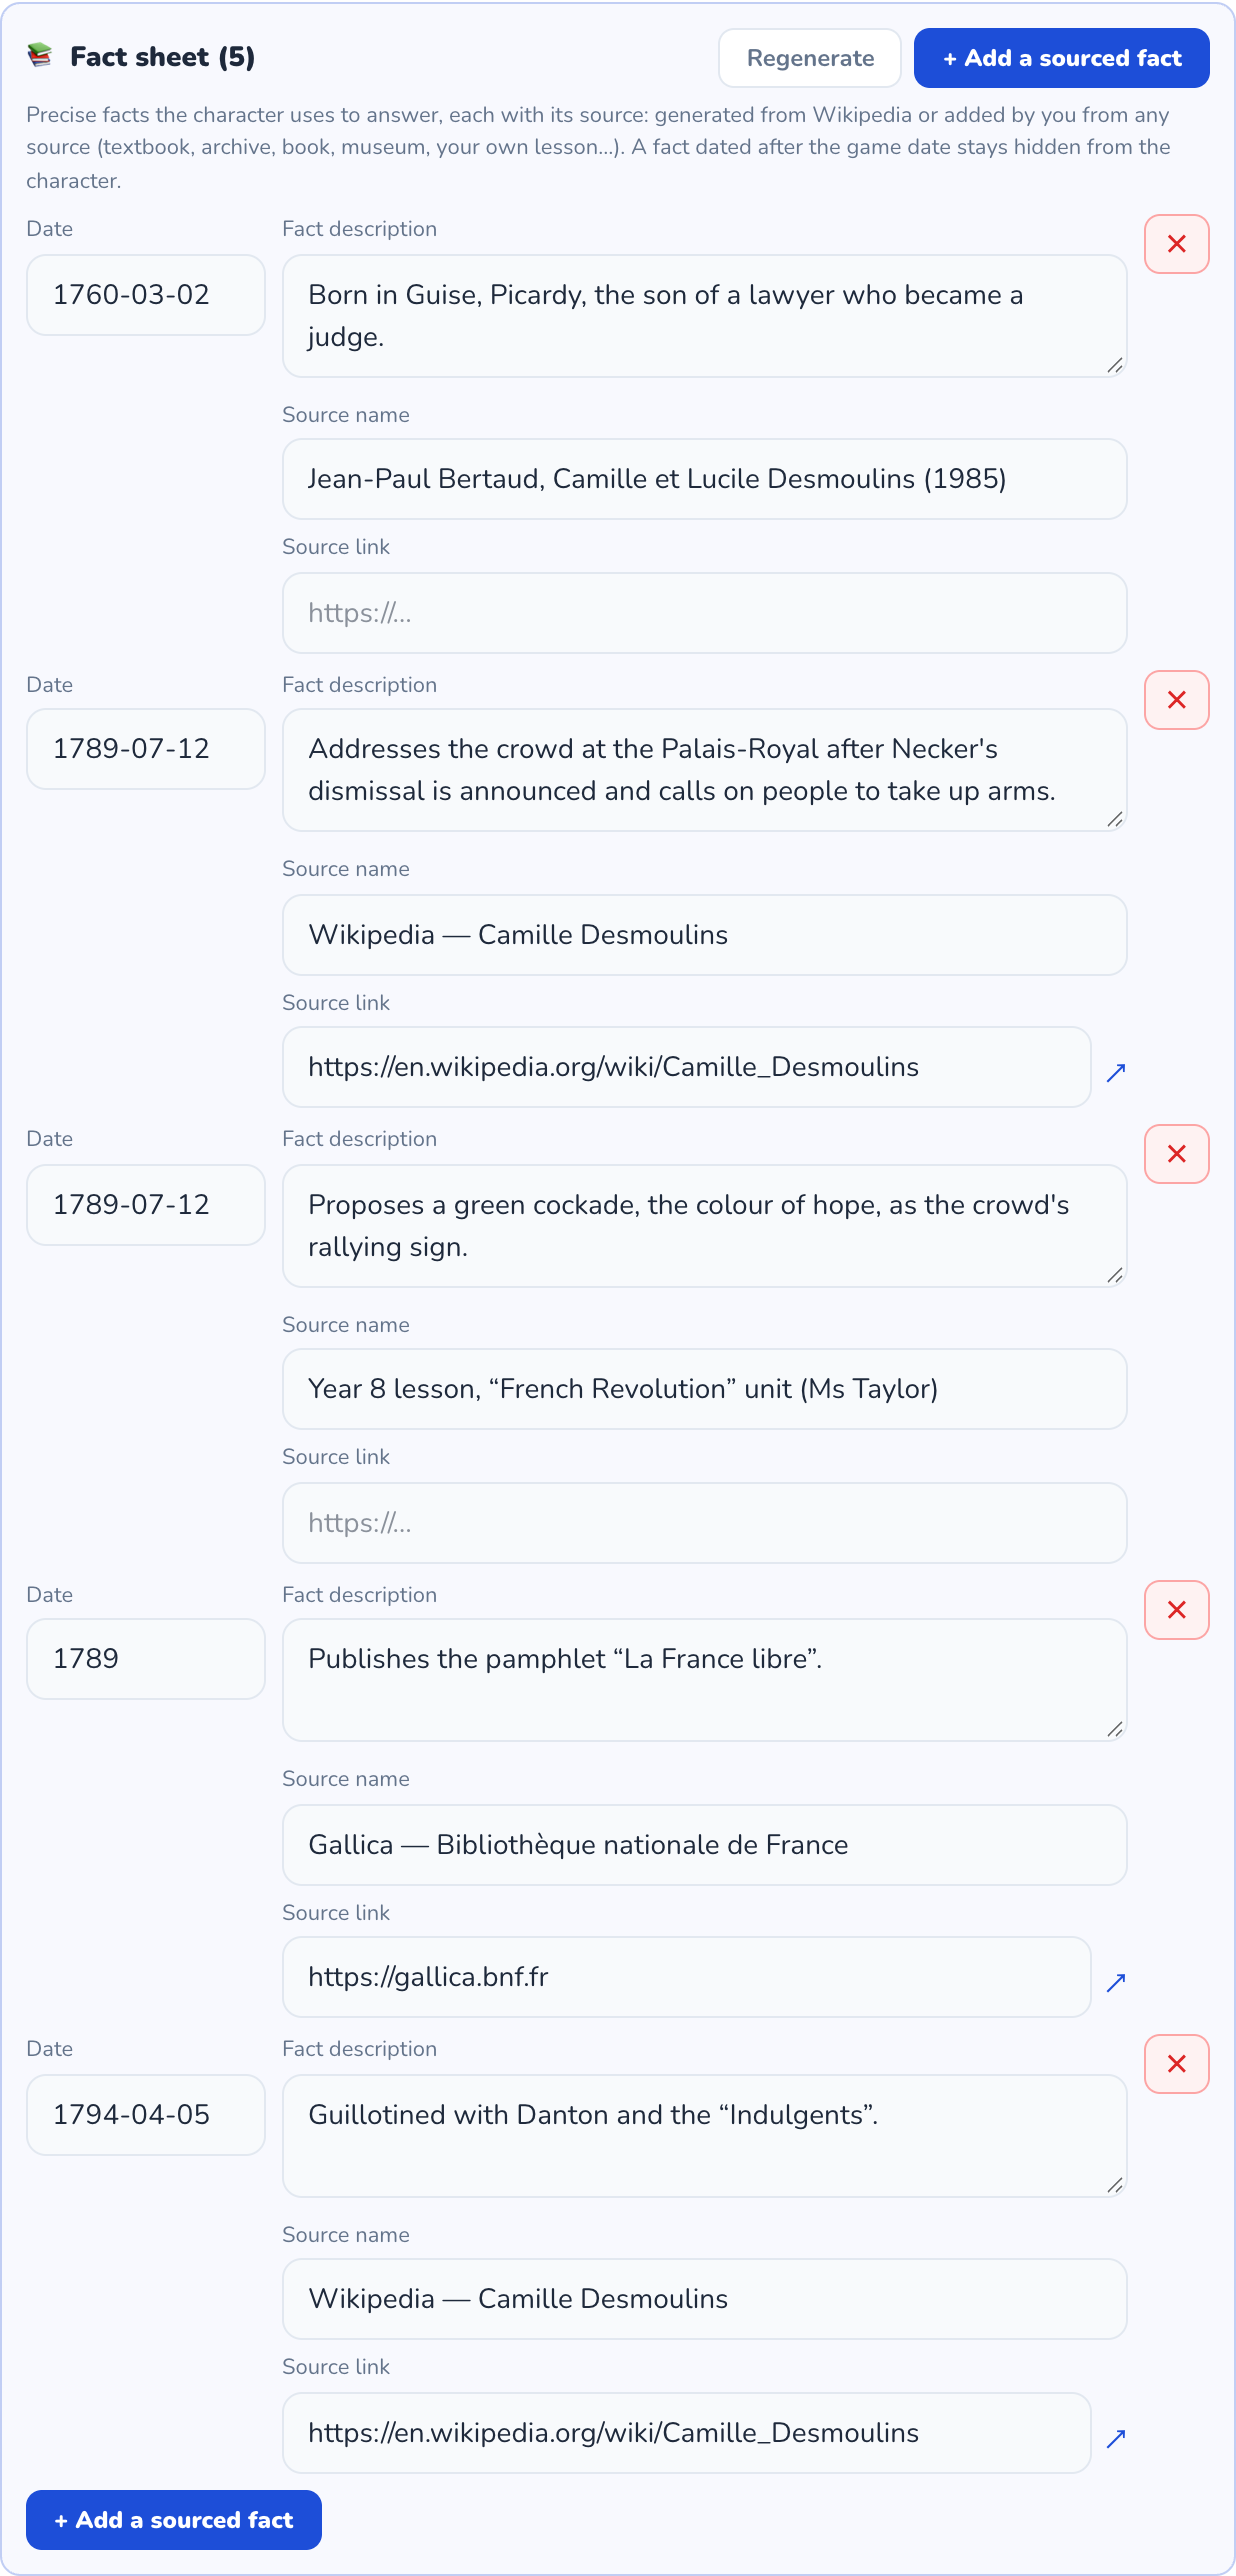
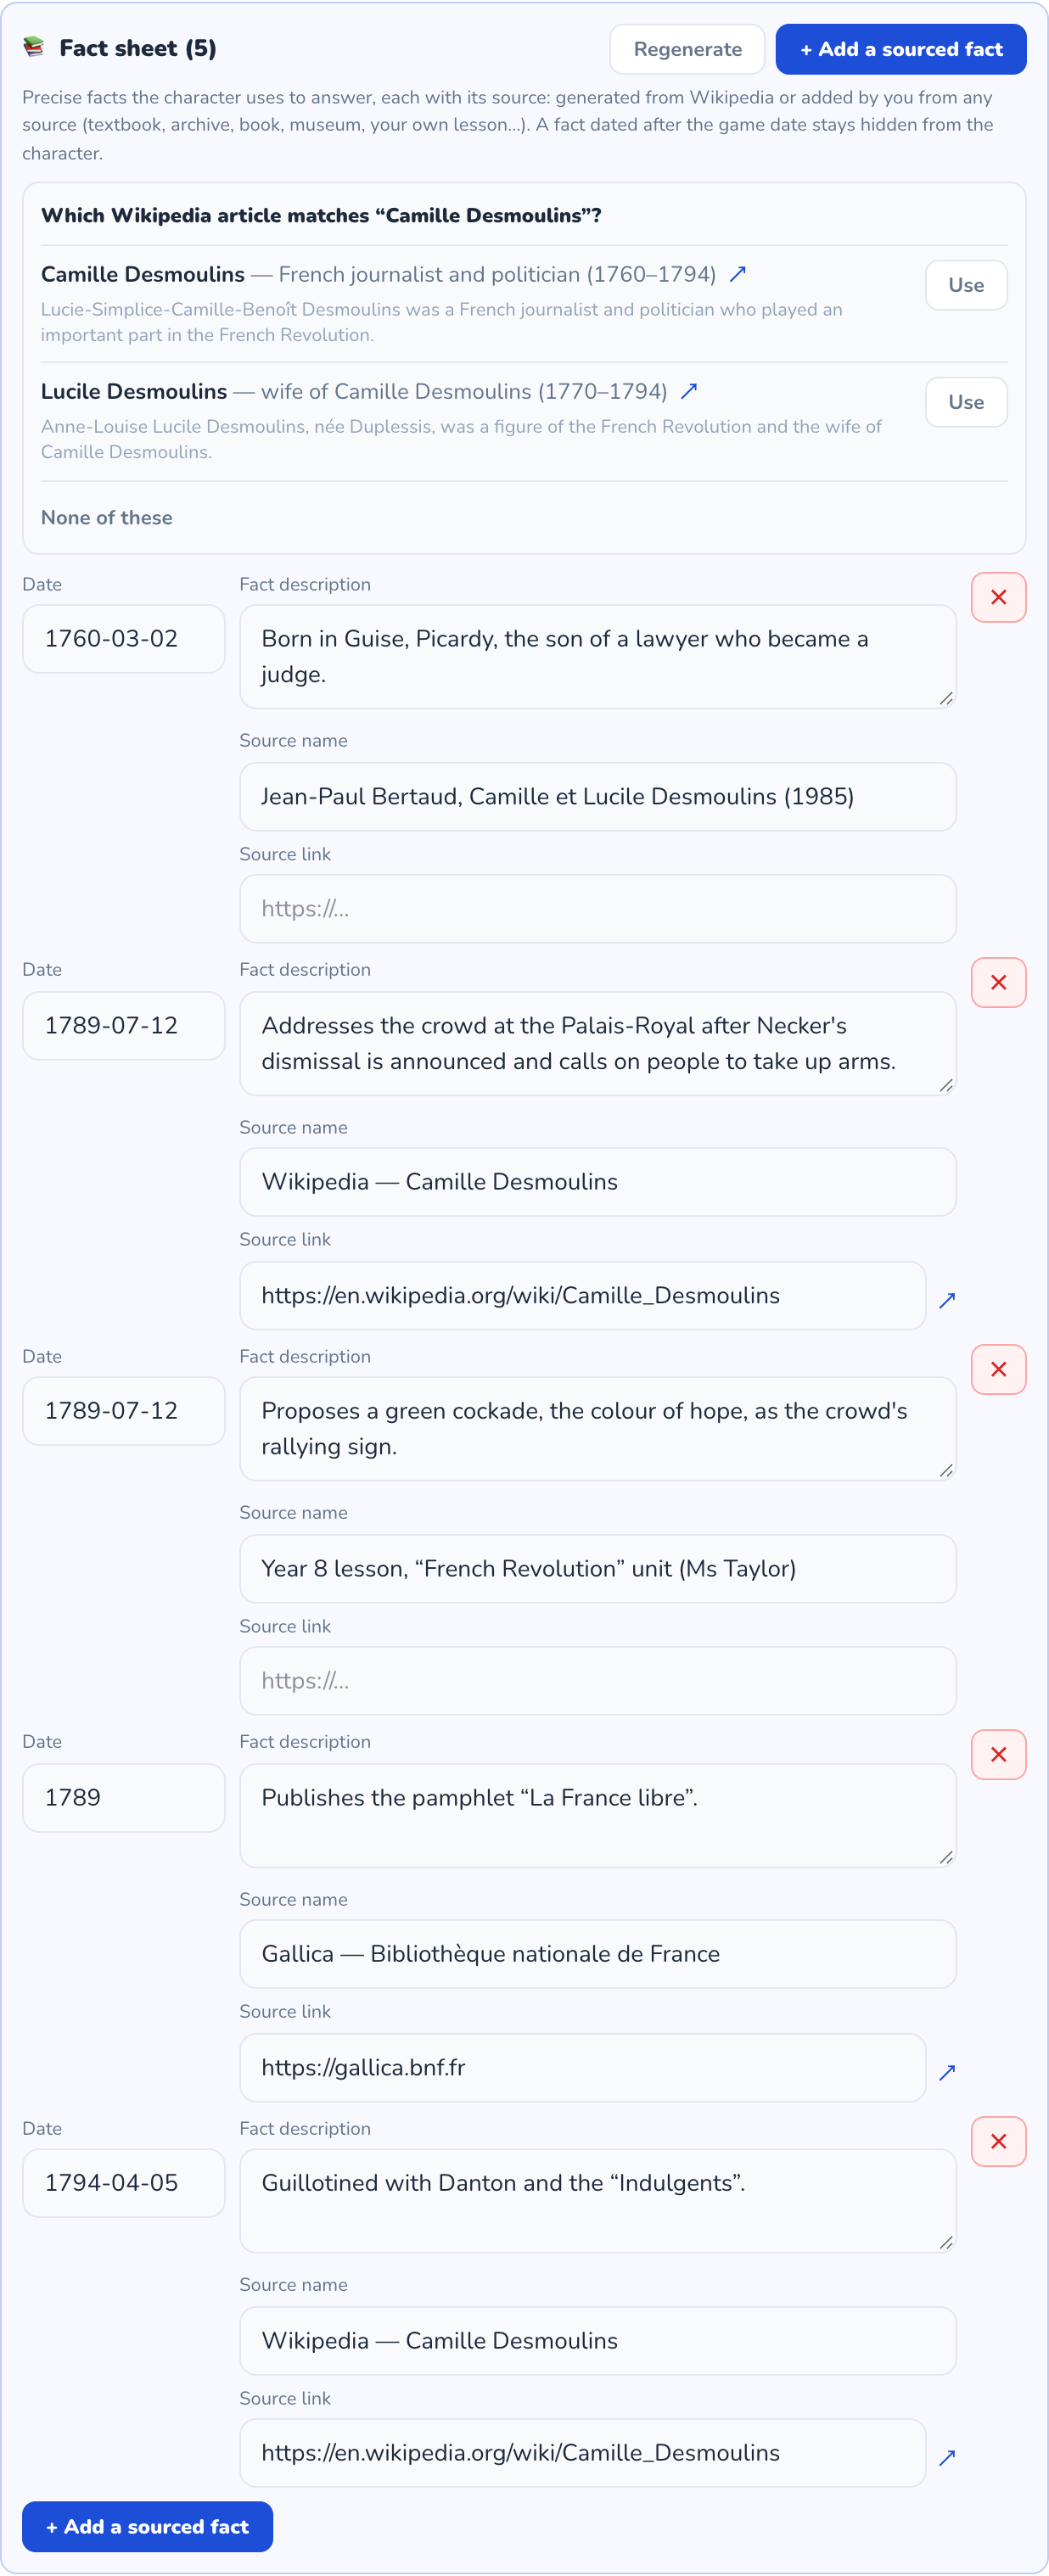
A character's fact sheet holds precise, sourced facts they use to answer — this is what avoids vague answers about a work, a date or a meeting. Any fact, with any source: a book, an archive, a museum, a textbook, your own lesson, a website… Wikipedia is just one possible starting point.
- “+ Add a sourced fact”: a date (or just a year), a short description, the source name as you want students to see it (“The National Archives”, “Textbook p. 42”, “Ms Taylor's lesson”) and, if there is one, a link. Fill in one fact before adding another.
- To get started faster on a real character, “Generate from Wikipedia” (or “Regenerate”). Parlova suggests the articles that might match the name: pick the right one (“Use”), or “None of these”.
- Review each fact: date, description, source name and link (↗ to check). Correct or delete whatever is wrong.
💡 Concepts and context
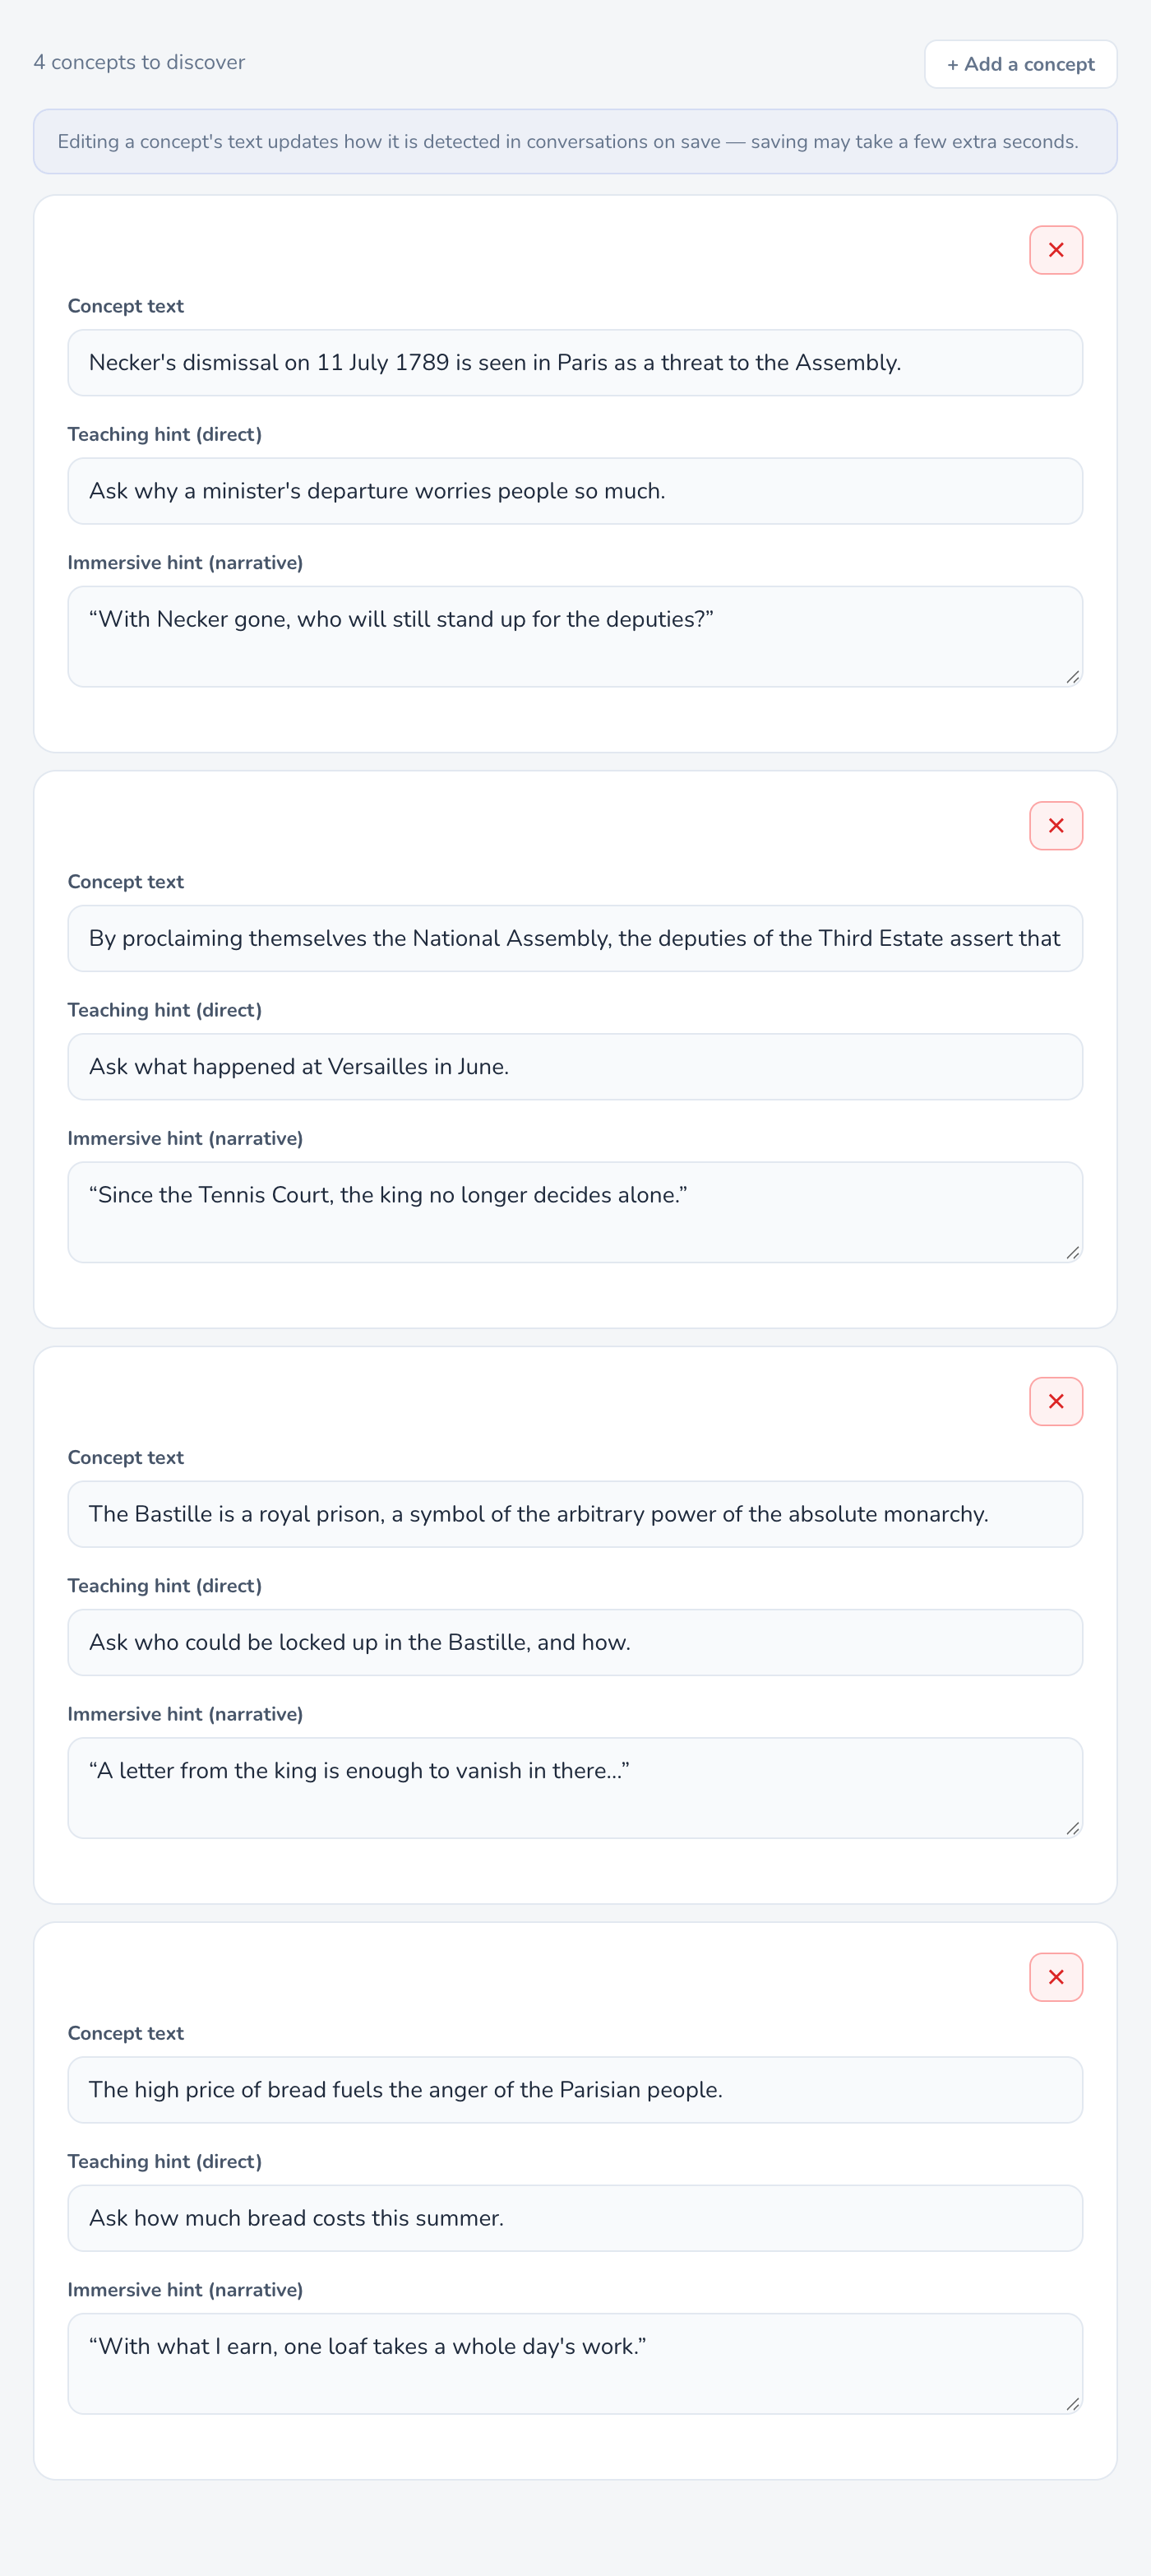
Concepts tab
Each concept is something the student must discover in conversation. The text is used for in-game detection: write it as a statement (“The high price of bread fuels the anger of the Parisian people”), never as a question. A new concept must be ticked for at least one character (“Known concepts”), otherwise no character is in charge of revealing it.
Context tab
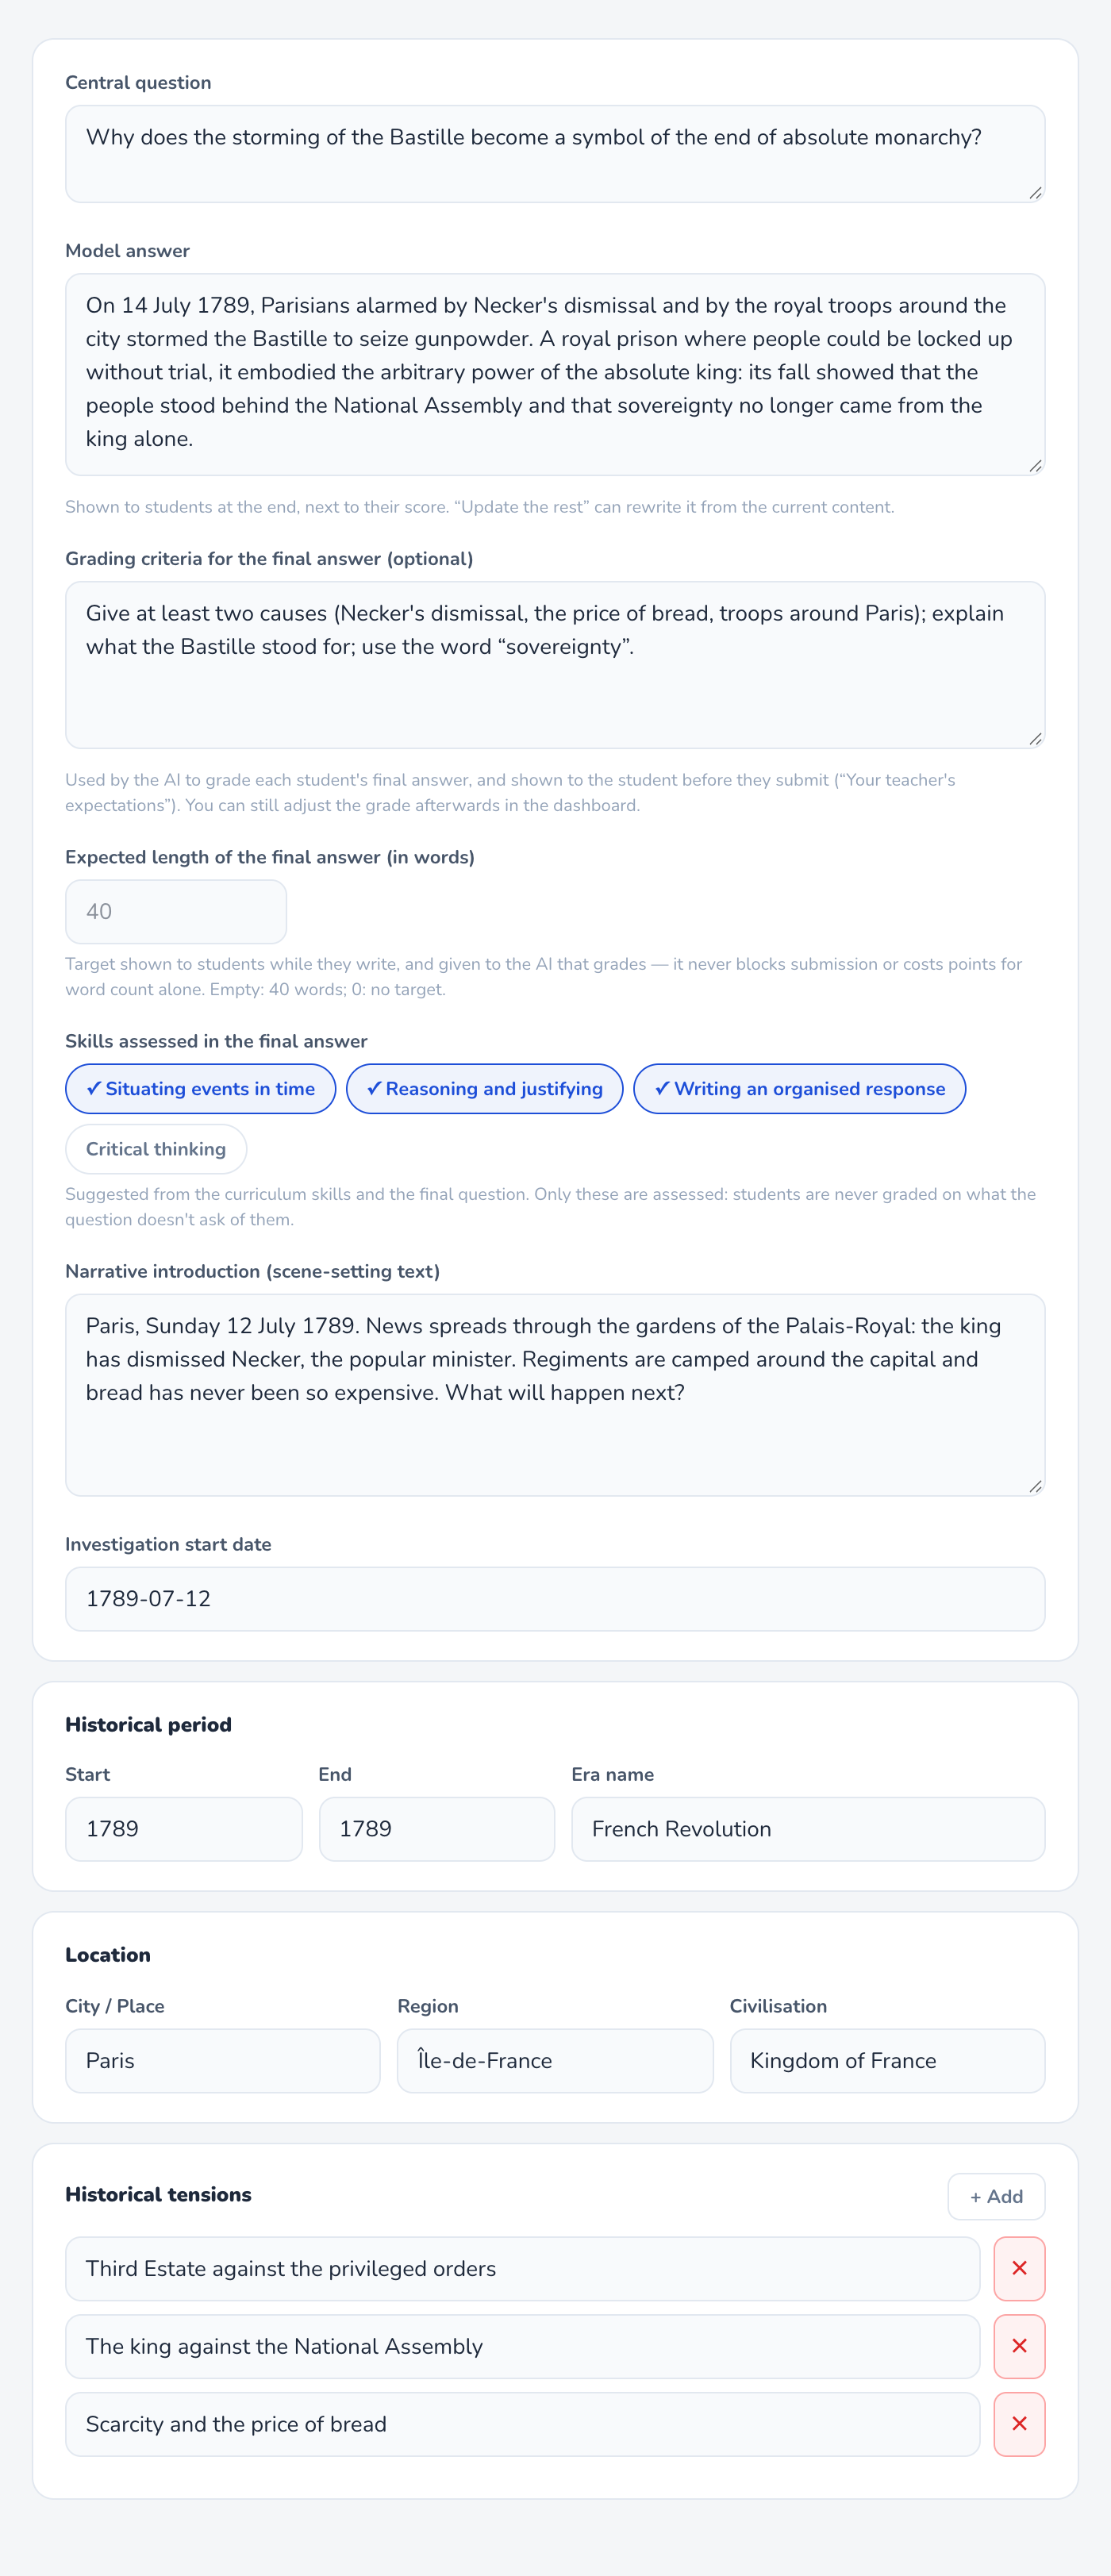
| Field | Role |
|---|---|
| Central question | The final question put to the student. |
| Model answer | Shown to the student at the end of the game, next to their grade. |
| Grading criteria | Taken into account when grading, and shown to the student before submitting (“Your teacher's expectations”). |
| Expected length | Word target shown while writing (empty = default, 0 = none). |
| Skills assessed | Saved as soon as you tick them; only these are graded. |
| Narrative introduction | The scene-setting text read at the start. |
| Start date, period, location | The time and place framework (step 8). |
| Tensions | The conflicts running through the mission (Third Estate against the privileged, king against Assembly…). |
🗓 Dates and timeline
In a history mission, dates are not decoration: they decide who can speak, what each person knows and when the student can go. They are set in seven places.
| Date | Tab | Effect in the game | Example |
|---|---|---|---|
| Investigation start date | Context | The game's “present” at the start. Everything else is compared to it. | 1789-07-12 |
| Period (start, end, era name) | Context | The overall framework of the mission, in years. | 1789 → 1789, “French Revolution” |
| Timeline dates | Timeline | The steps the student sees, sorted automatically. One click = time travel. | 1789-05-05 … 1789-08-26 |
| Event date | Events | Places the twist in the story's time. | 1789-07-14 |
| Birth, death, active from / until | Characters | Set when a character can be questioned: greyed out before or after. | de Launay: 1740 → 1789-07-14 |
| Sourced fact date | Characters | A fact dated after the game date stays secret for the character. | Desmoulins' death: 1794 |
| A source's “Known from” | Sources | Before this date, no character can rely on the document. | Declaration: 1789-08-26 |
Building the timeline
- “Timeline” tab → “+ Add an event”.
- Enter the date (YYYY-MM-DD, YYYY-MM or just a year; “-52” for a year BC) and a short description.
- When you leave the date field, the timeline sorts itself in chronological order.
- To remove a step: ✕. To move it: change its date.
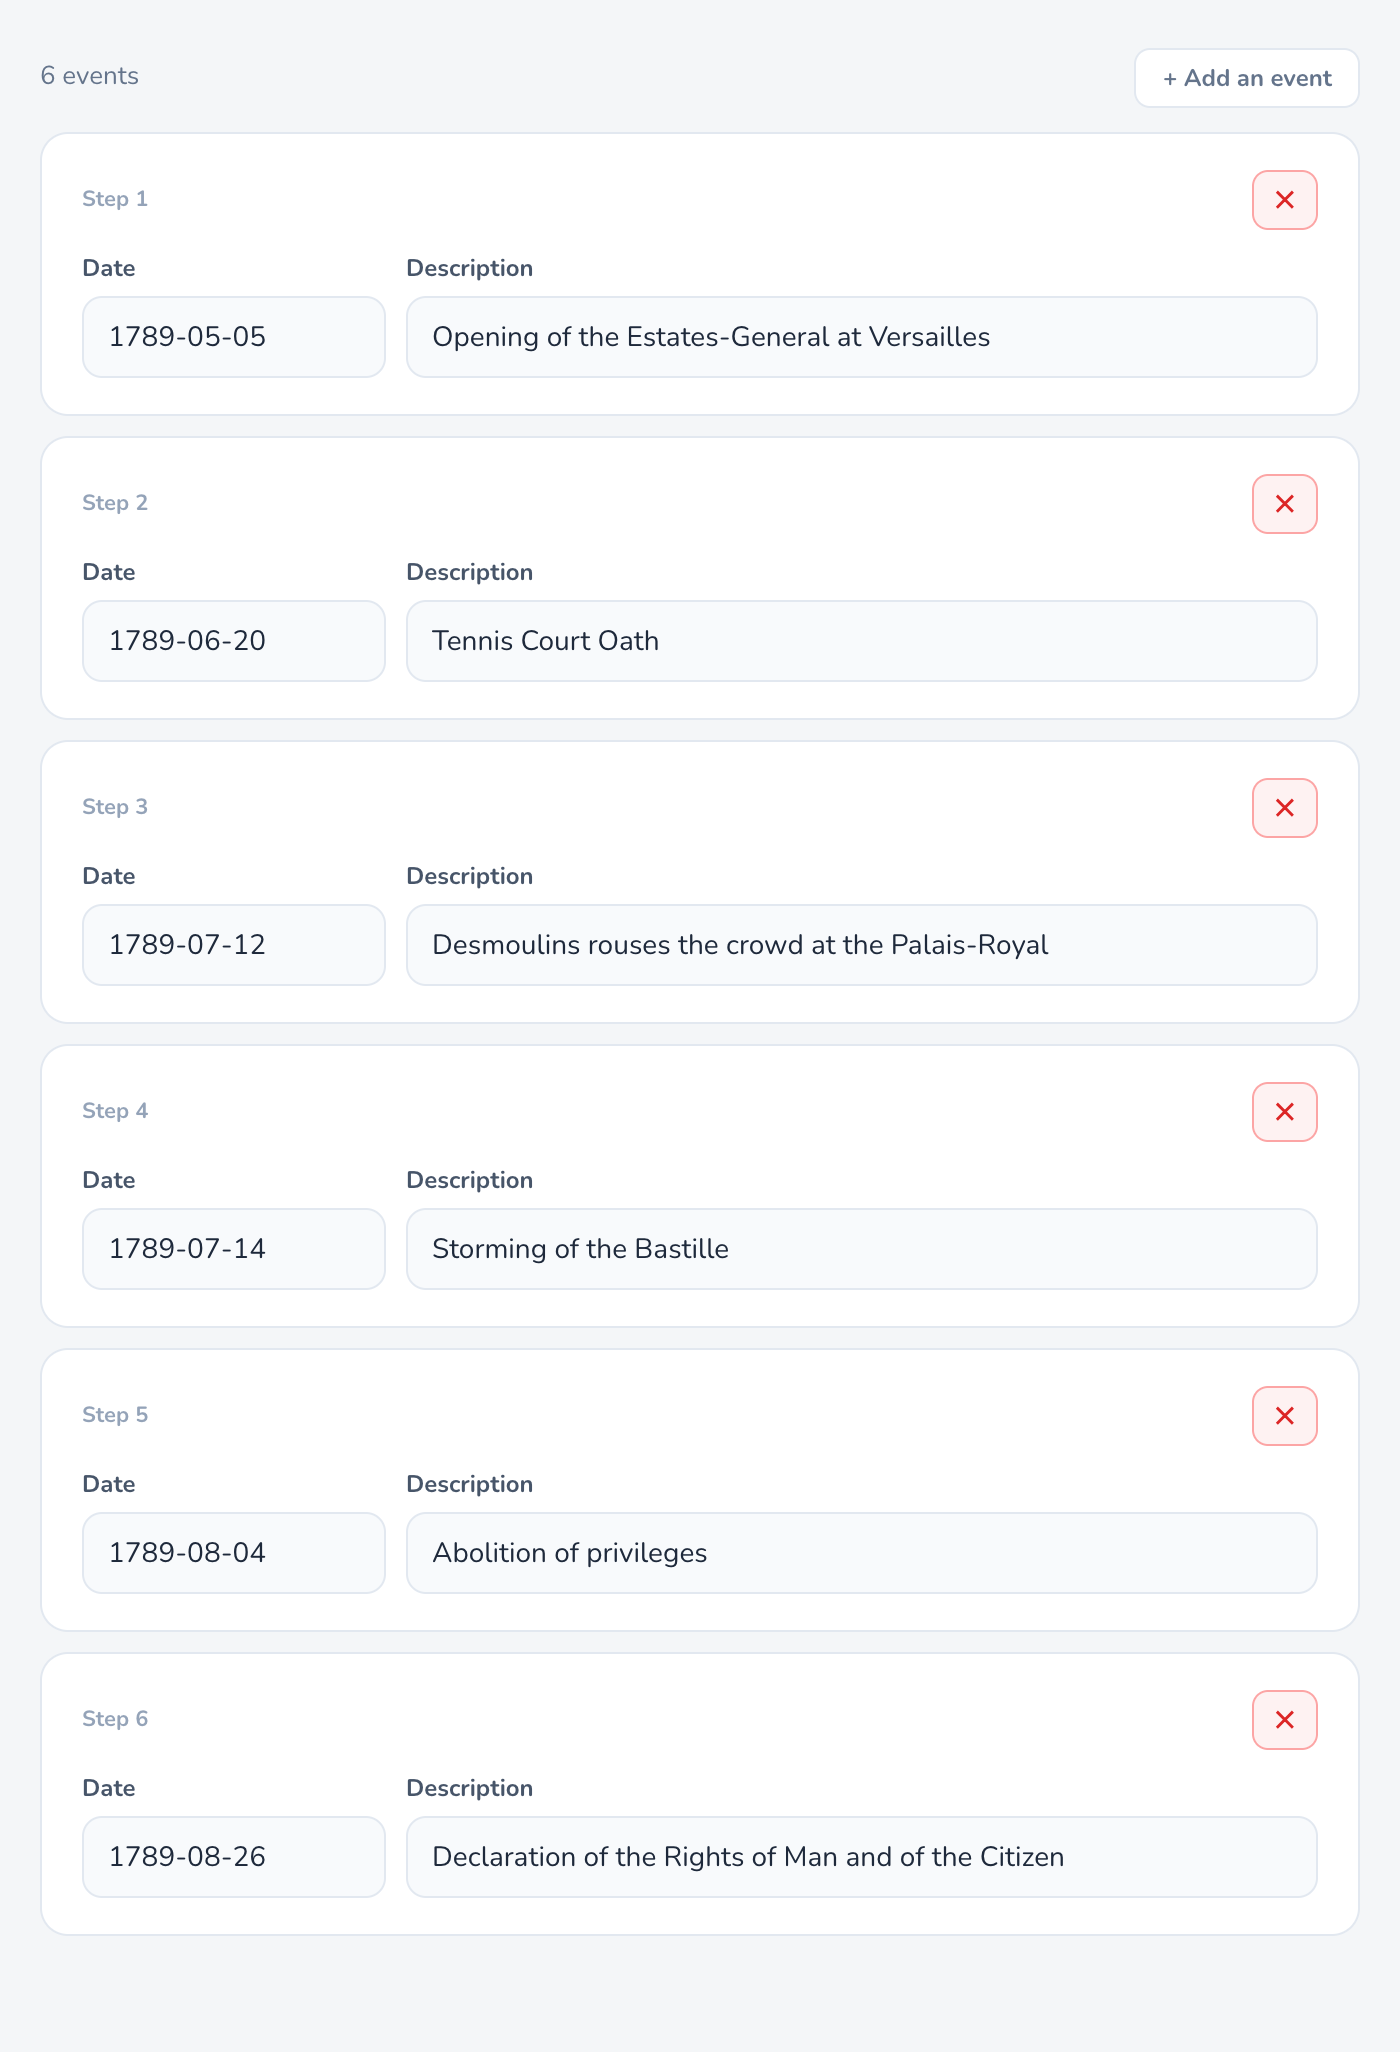
In the game, the student opens the timeline at the top of the screen and clicks a date to travel there: characters then answer from that moment. On 14 July, de Launay can still be questioned; on 4 August, he is gone.
⚡ Events and plot twists
Events are plot twists that happen during the game: all characters then know their description and react accordingly.
- “Events” tab → “+ Add an event”, then “Edit”.
- Title and date (YYYY-MM-DD, as on the timeline; a step number outside History-Geography).
- Description: what happens, from the point of view of someone living through it.
- Trigger conditions: “Minimum exchanges” (questions asked by the student, across all characters) and “Minimum notions found” (0 = no condition).
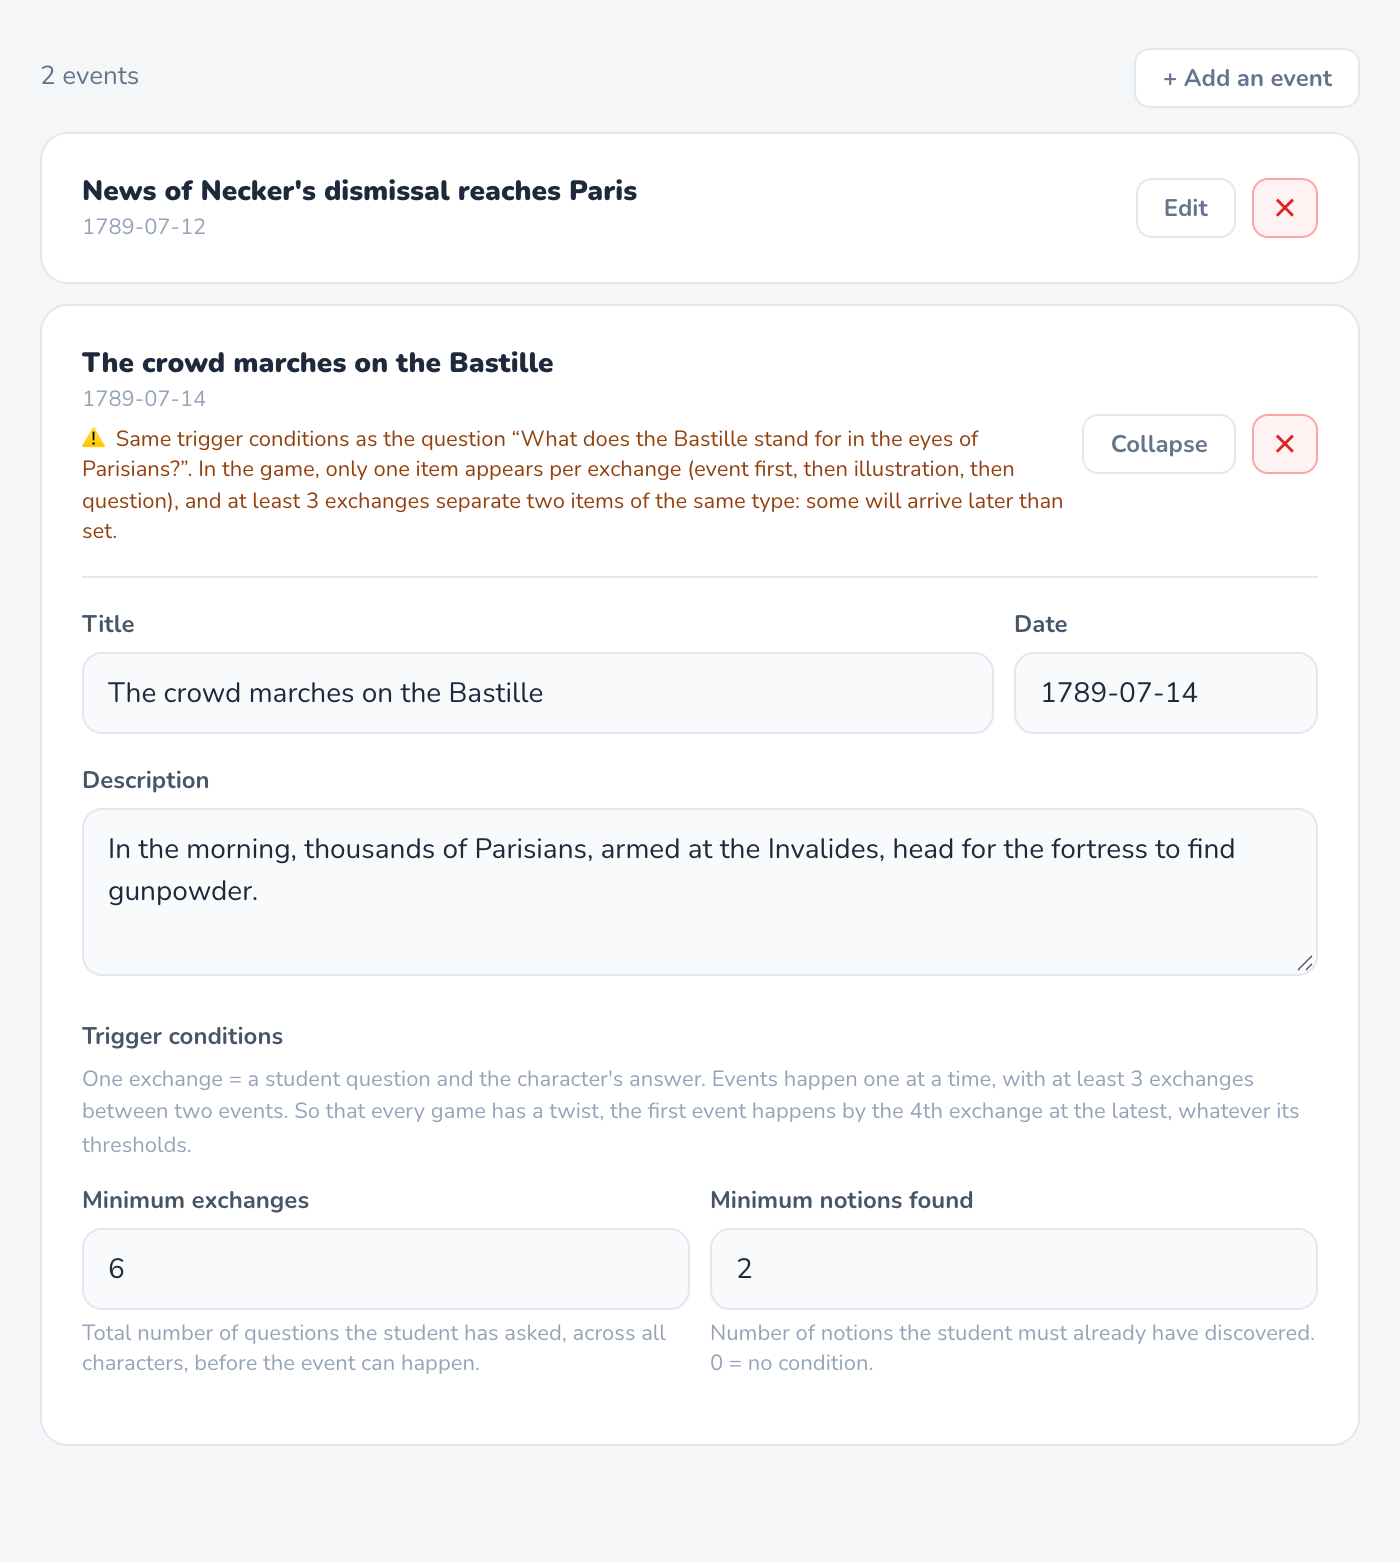
How they follow one another in the game
Only one element appears per exchange (event first, then illustration, then question), with at least 3 exchanges between two elements of the same kind. The first event arrives by the 4th exchange at the latest, whatever its thresholds, so every game has its twist.
💾 Save, update the rest, test
Save
“Save” saves every tab at once. At that moment: character sheets are rebuilt with their sources and known concepts, changed names are carried over everywhere, detection of edited concepts and answers is updated (a few extra seconds), and new documents are indexed for search during conversation.
↻ Update the rest
Some parts are derived from the content: the model answer, the solution (Explanation tab), the printable sheet (Memo tab), and how characters react to events. If you change the question, concepts, timeline or characters, they may still describe the old version — an orange banner says so.
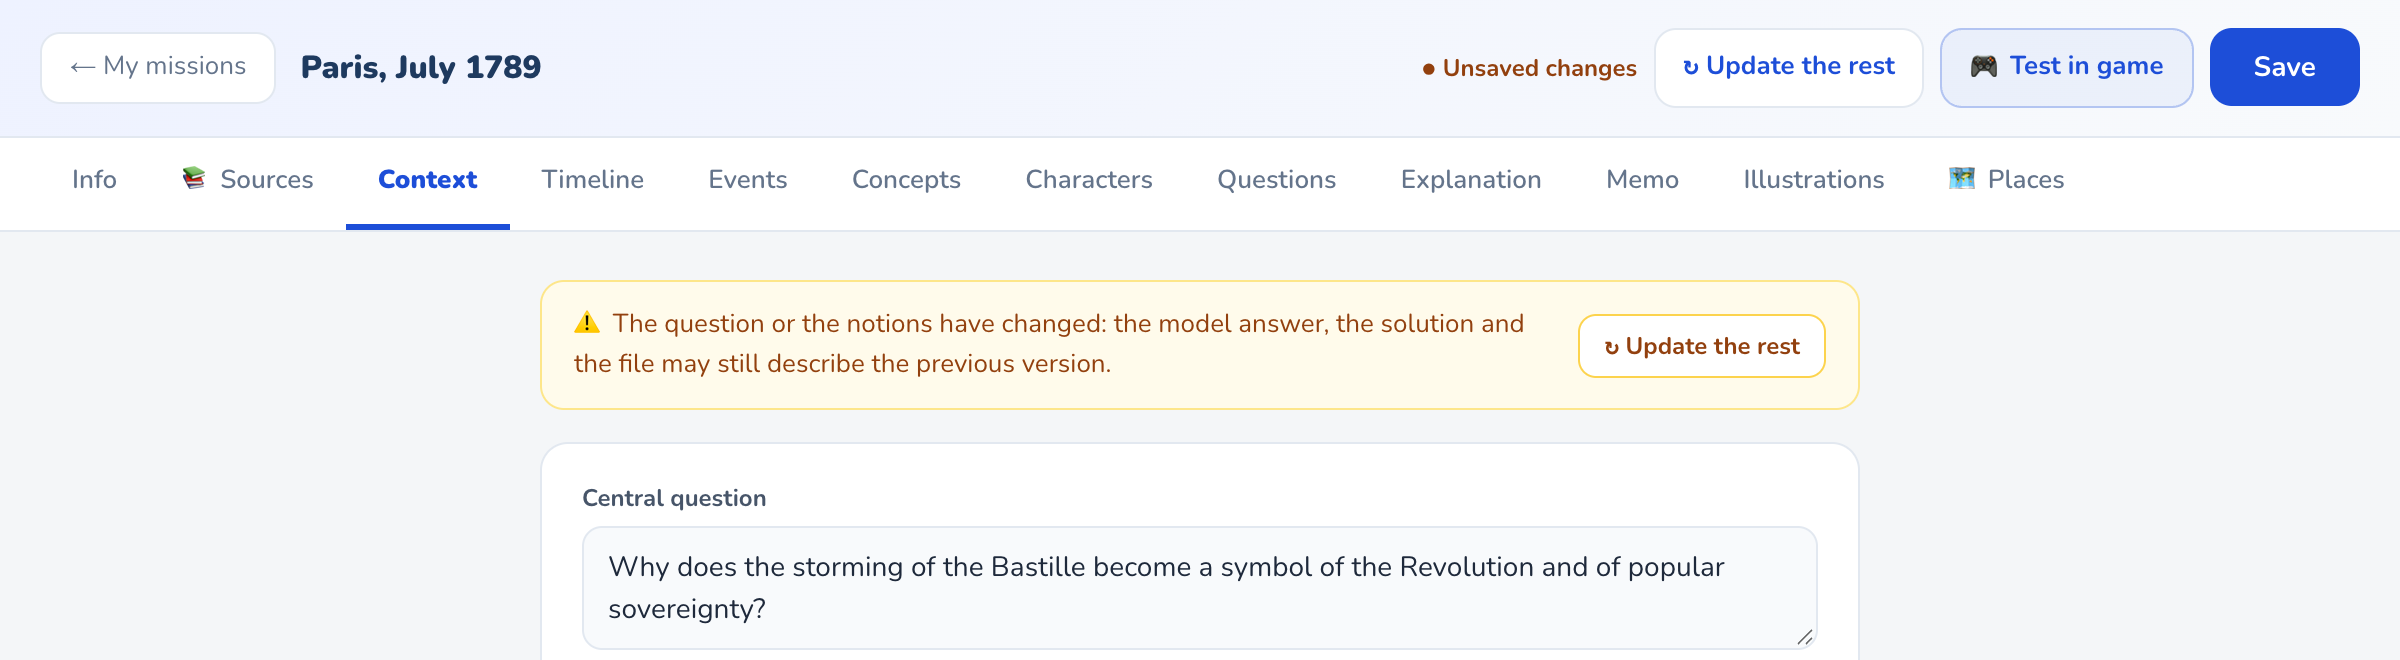
The button (greyed out while nothing has changed) suggests new versions of those parts only. Tick what you want to replace, then “Apply and save”. A part you edited by hand is unticked by default.
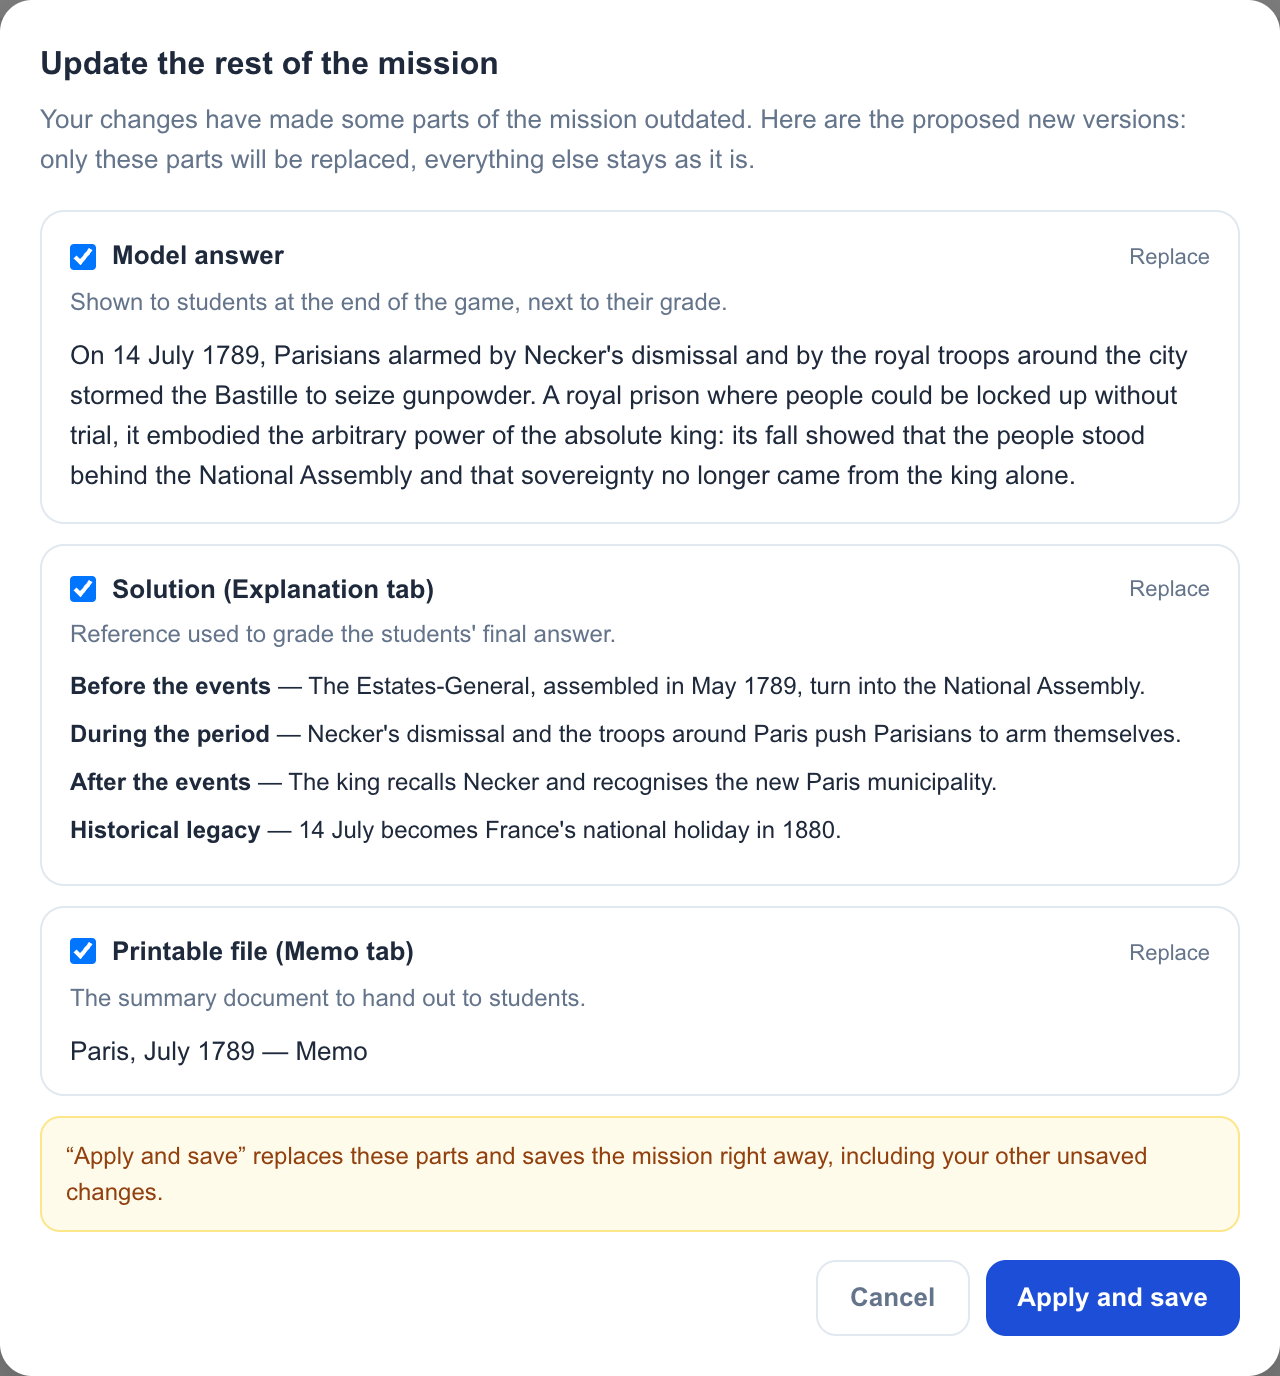
🎮 Test in game
Opens the mission in a new tab, as a student would see it (pending changes are saved first). Test at least: one character per viewpoint, a jump on the timeline, a question that draws on a source (the quoted passage should appear under the answer), and the arrival of the first event.